How Long Does It Take To Grow Mushrooms?

How Long Does It Take To Grow Mushrooms

From ancient times, mushrooms have captivated people because of their diversity and peculiar growth habits. Knowing when mushrooms develop is an essential piece of information for anyone interested in mycology or home gardening.

A Mushroom’s growth period varies from species to species. It has a growing cycle from spores to becoming a mature fruit body.

Different mushroom types have different growing cycles. For instance, famous white button mushrooms usually mature in 5-7 days, while puffballs are one of the hardest, taking quite a few months to fully mature. Every mushroom has its specific period of growth, but the environment and growing conditions influence it.

This blog examines the variables that determine how fast mushrooms grow, from sprout to mature, as well as the intriguing topic of mushroom farming.

Stages in Mushroom Grow Cycle

Mushrooms are the reproductive organs of numerous varieties of fungi and are frequently referred to as the “fruit” of fungi. The mushroom growth cycle process can be divided into five general stages:

1. Germination of Spores

Spores are microscopic reproductive cells that germinate to begin the process. When the proper moisture, temperature, and substrate conditions are met, spores begin to germinate. The mycelium produced has features that resemble threads.

2. Mycelia Growth

As the mycelium extends out searching for food, it eats any organic elements. Depending on the type of mushroom and the environment, this stage could take a few days to many weeks.

3. Formation of Primordia

As mycelial networks age, they begin to create small, pin-like structures called primordia. Primordia are the initial stages of a mushroom’s growth and indicate that the fruiting process is about to begin.

4. Fruiting Body Development

The expansion of promordia produces the characteristic stems and caps of adult mushrooms. Depending on some variables, including temperature, humidity, and substrate quality, this stage may take a few days to several weeks.

5. Release of Spores

The fungal mushroom stages can continue when the mushroom cap splits open after it has grown entirely, enabling spores to escape into the surrounding air.

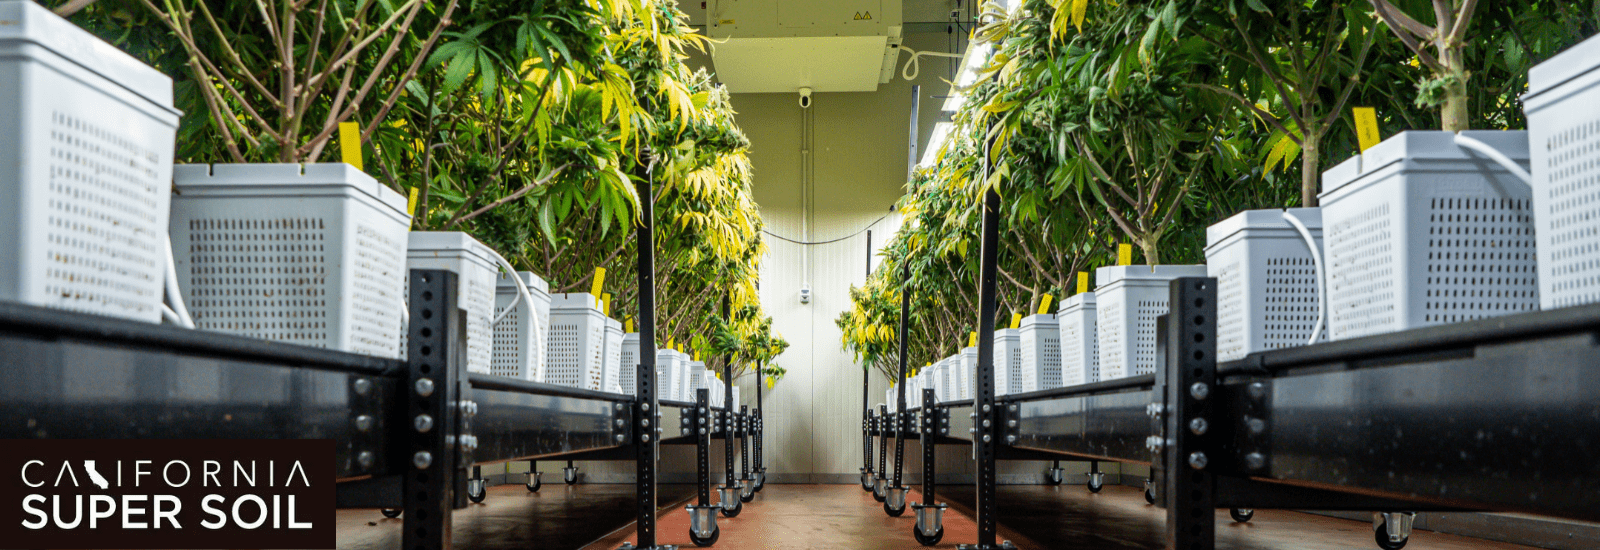
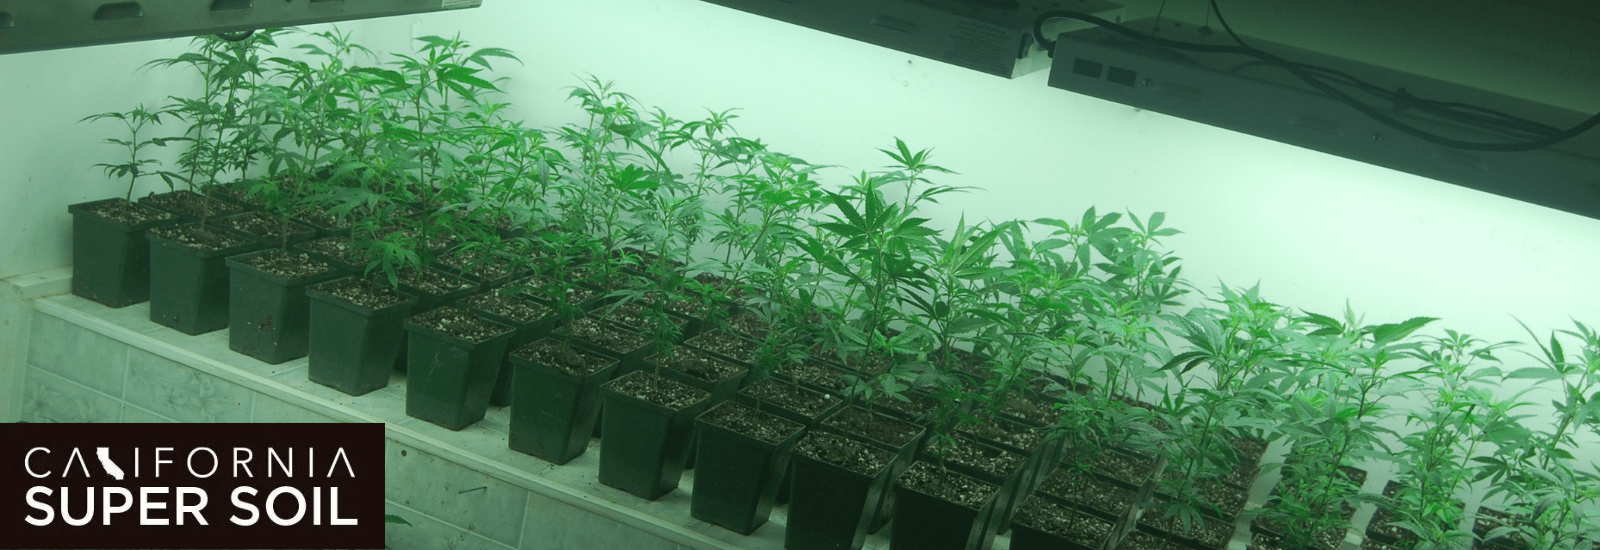
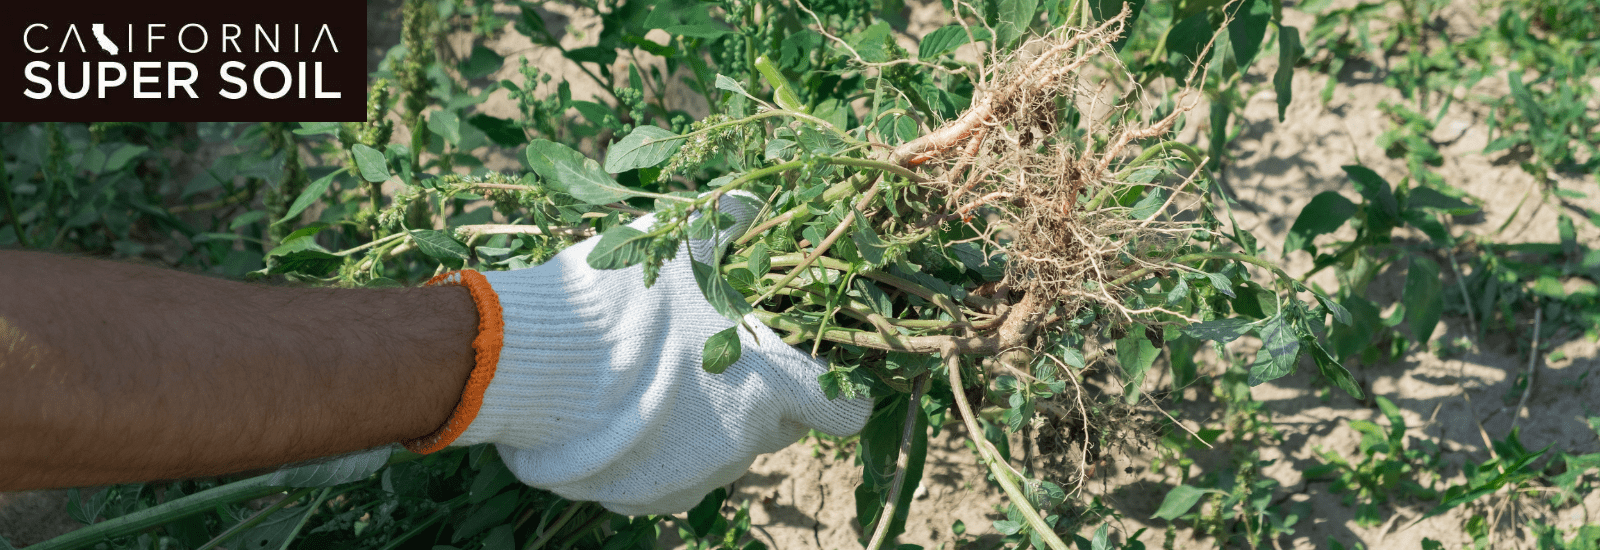
Check out for super soils to grow mushrooms

fastest growing mushrooms

Factors Influencing the Growth Time of Mushrooms

Several factors influence the rate of mushroom growth:

Species of Mushrooms

Every type of mushroom has its own growth requirements and schedule. While certain species, like oyster mushrooms, may take a few weeks to develop, others, like morel mushrooms, may take many weeks to months.

Environmental Conditions

The three most important environmental factors are temperature, humidity, and light. Most mushrooms thrive in specific temperature and humidity ranges, and exposure to the right amount of light or shade can cause fruiting. 

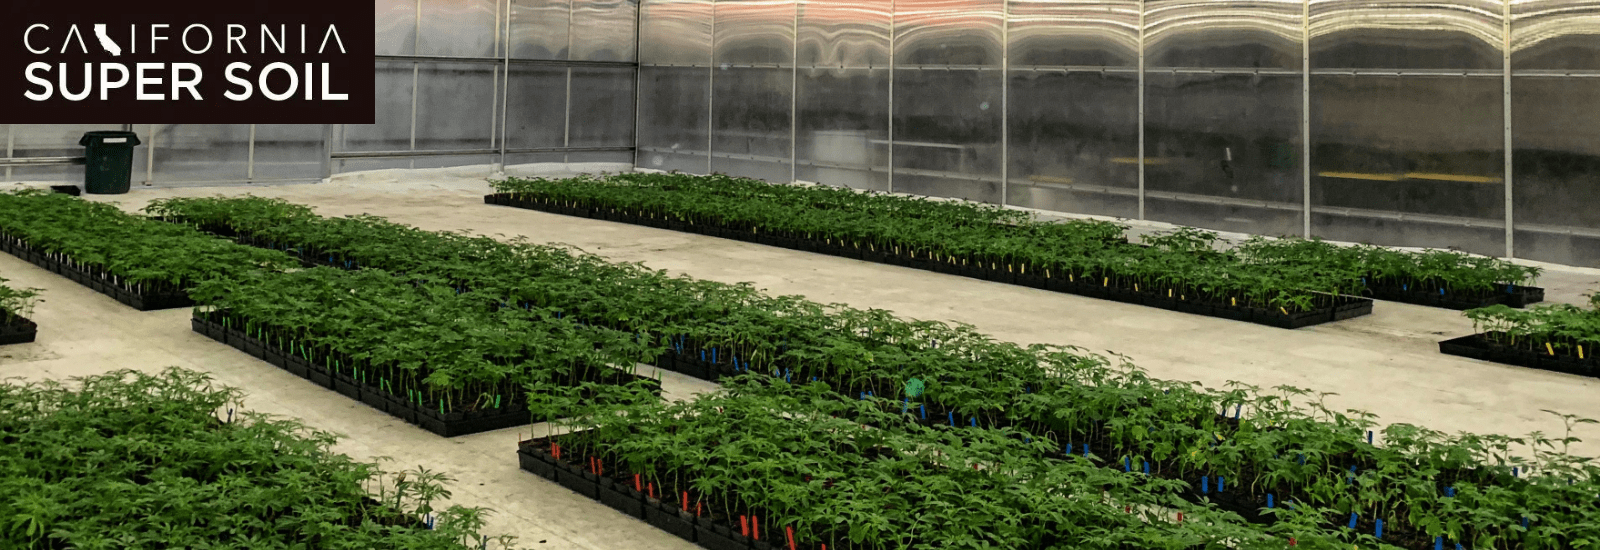
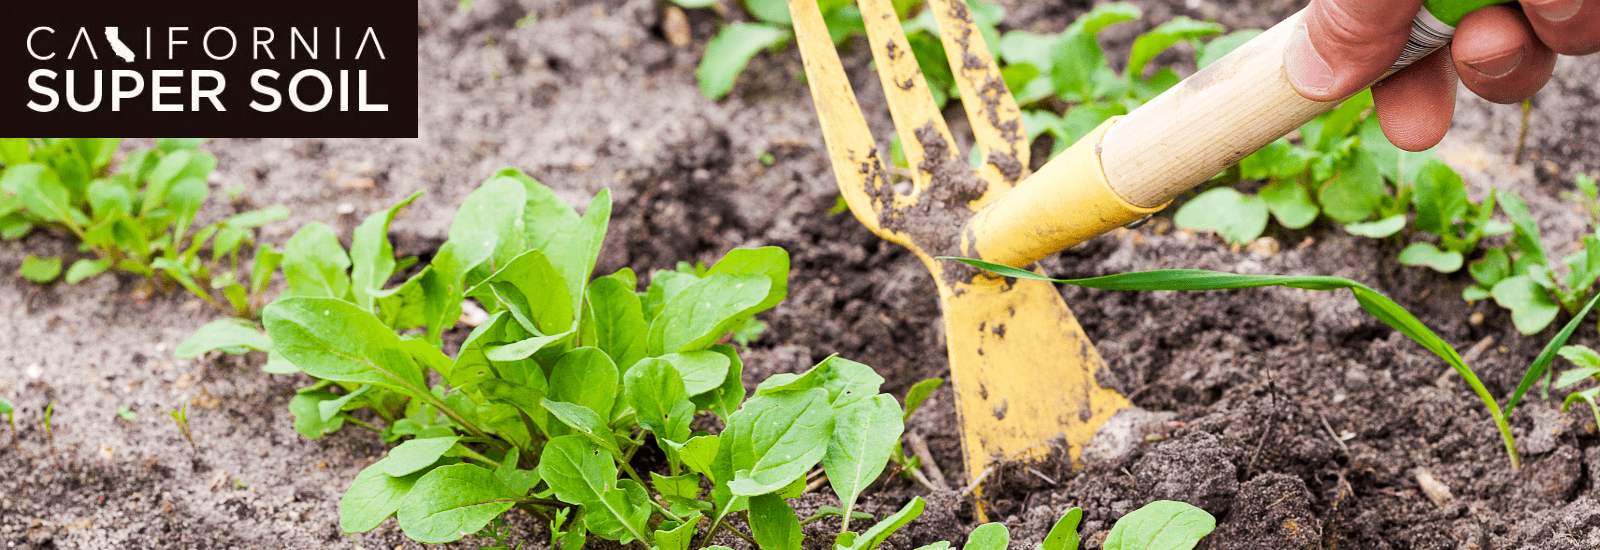
Meet environmental conditions with our support items

Substrate

The material used as the mushroom growing medium, or substrate, significantly impacts the length of the growth period. Typical substrates include wood chips, compost, and straw. Three things must be considered: substrate type, nutritional content, and moisture content. 

Growing Method

Mushrooms can be grown in many ways, including indoor and outdoor beds. The approach employed can affect development times; for example, growth can happen more quickly in controlled indoor environments than in outdoor ones.

Genetic Variability

Similar to how plants vary in their pace of growth, mushrooms within the same species may exhibit slight variations in growth time due to genetic variability.

Mushrooms Growth Duration

Let’s examine the growth cycles of a few popular mushroom varieties and determine which are the fastest-growing mushrooms.

White Button Mushrooms or Agaricus Bisporus 

This is a favorite type among beginning growers since they can be picked 2-4 weeks after inoculation.

Shiitake Mushrooms (Lentinula edodes)

After producing primordia, shiitake mushrooms usually take 1-2 weeks to mature, depending on the growing conditions.

Agaricus Bisporus Var. Portobello

It may take a further week or two for mature white button mushrooms, also called portobello mushrooms, to reach the recognizable enormous size and color of their caps.

mushroom grow cycle

Mushrooms Cultivation Process

Mushroom growing enthusiasts have developed several techniques to extend the development period and increase yield. The following are some techniques that can impact the rate at which mushrooms grow:

1. Casing 

This is the process of coating the mycelium with a layer of peat moss or vermiculite, which is rich in nutrients. Speeding up the development of primordia and fruiting can shorten the overall growth period.

2. Dunking

This is the technique of briefly submerging the substrate and mycelium in water. This promotes quicker bodily development and aids in the body’s moisture replenishment.

3. Cold Shocking

Some types of mushrooms benefit from “cold shocking,” or a sudden drop in temperature. This mechanism promotes the production of primordia, which can speed up overall growth.

4. Monotub Cultivation

This popular indoor mushroom production technique, known as “monotub cultivation,” offers regulated growing conditions. If properly monitored and adjusted, monotub designs can produce higher yields and faster growth.

Check out our Nutrient Shot for mushroom growth

How You Can Take Out Magic Mushrooms Safely?

When you take out magic mushrooms, start with a small amount to check how your body responds to it. While you try to be in a place, trusted friends around for supervision. It’s best not to take mushrooms if you are on medication or if you’re feeling down for any reason because then it can negatively affect your health.

Always confirm the mushroom species before taking it because some can be highly toxic, or you can be allergic to them. 

Does Growing Mushrooms Require Much Work?

Mushroom cultivation is not difficult at all! Growing mushrooms at home is simple: begin with the proper preparation and adhere to guidelines.

A high-yield crop that may be grown in small areas is mushrooms. They are consequently among the easiest and most profitable crops for beginning producers. Some species are simpler to raise when you’re just starting than others.

Growing oyster mushrooms is one of the simplest. Additionally, some growth techniques require little work or understanding and are easier to utilize.

Which Mushroom is the Fastest to Grow?

Pink oysters are the fastest-growing mushrooms. They can be gathered from seed to plate in about 13 to 15 days. Every oyster mushroom cultivar grows fast and powerfully, making them ideal for novices. 

Can a Mushroom Develop in 24 Hours?

A mushroom cannot complete its life cycle in one day. It takes a lot of effort to develop a network of mycelium or plant roots before mushrooms can grow. This surgery is typically performed underground, away from public view. As a result, it suggests that mushrooms can appear overnight.

Once they begin to fruit, mushrooms can grow four times larger in a single day. When they get started, the transition is rather remarkable. However, it is vital to remember that weeks of development occur beneath the surface. Mushroom development can begin once the mycelium has colonized the substrate completely. 

Conclusion

Growing mushrooms is an exciting process governed by various factors, including species and environmental considerations.

Remember that patience and attention to detail are essential when you embark on your mushroom cultivation journey. With the correct conditions and close observation, you may see the fascinating process of a spore turning into a fruiting body and reap the abundant benefits of your labors.

What is Deep Water Culture Systems: A Complete Guide

What is Deep Water Culture Systems

Deep water culture (DWC) systems can be very effective when properly configured and substantially benefit labor, fertilizer, and water savings. Furthermore, given the appropriate strain of the plant, DWC systems enable nearly infinite plant size.

DWC setups provide a more flexible and automated feeding schedule, faster growth rates, ease of scaling, and the creation of fragrant, clean, sugar-coated blooms.

Although DWC kits have a lot of potential, setting up a dependable system can be difficult. Aeration, recirculation, soluble fertilizer, water temperature, and other variables must all be closely watched and maintained during the process. However, DWC may be a fruitful and effective growing technique with the appropriate strategy and attention to detail. This blog will discuss DWC in detail and how to build a DWC system.

What is the DWC System?

There are various techniques for deep water culture hydroponics or soilless plant growth. In DWC, plants are fully immersed in aerated water, which offers them an exceptionally oxygenated and nutrient-rich environment.

DWC setups are customizable and can be scaled up or down based on need. You only need water, fertilizer, and a deep water culture hydroponic medium to support the plants.

These plants will pay you back with outstanding yields and quick vegetative growth. Cannabis cultivated in a well-thought-out DWC system has the potential to grow up to 10 cm in a single day with the correct nutrients and strain!

Building your own DWC system is feasible but challenging, particularly if you lack hydroponic engineering knowledge. In that case, it might be best to let the professionals handle the construction.

How Does DWC Work?

To understand how a DWC system works, it is essential to grasp its main components. The main parts are an air pump, a reservoir, and a net pot. But how do these functions in concert to provide a caring environment for plants?

Imagine a lettuce head, for example, gently resting on a reservoir that resembles a five-gallon pail. This plant has no roots buried in the ground like other plants. Instead, they dangle freely into the nutrient-rich water solution in the reservoir.

Usually, this would drown the plant, but the DWC system provides a clever workaround. The air pump part of the system adds oxygen to the water.  

The air pump in the system adds oxygen to the water. An air stone bubbles this oxygen through the water, making it accessible to the submerged roots. The roots absorb nutrients and oxygen from the water, giving the plant all it needs to grow and thrive.

water culture hydroponics

Varieties of Deep Water Culture System

DWC setups come in various forms, each with a unique setup and benefits. Let’s examine a few of the most common varieties:

Recirculating

The typical DWC setup is elevated to a new level with the RDWC technology. The nutritional solution can circulate between this configuration’s several connected buckets or containers. This design lowers the amount of individual care needed for each bucket and increases the availability of nutrients.

Raft System

Raft systems work well for cultivating herbs and leafy greens. These devices hang plants from floatable Styrofoam rafts. The plants’ roots dangle into the nutrient solution, instantly absorbing nutrients and oxygen from the surrounding water. This is a simple but efficient method used in both households and workplaces.

Commercial Raft System

As the name implies, large-scale raft systems are meant for commercial production. These efficient techniques generate enormous amounts of leafy greens in greenhouses and other controlled settings, significantly influencing the commercial water culture hydroponics industry.

Bubbleponics

A version of DWC called bubbleponics tries to accelerate the early stages of plant growth. Using a top-fed drip mechanism, this method sprays a nutrient-rich fluid into the roots. The initial supply of nutrients and the increased oxygen aid in speeding up the plant’s development.

Check out our soils for plant growth

How to Build a Deep Water Culture System?

One of the best things about installing a DWC hydroponics system is that it’s quite simple to begin going. Every component that’s needed is easily accessible. But it’s essential to choose the perfect spot first.

A DWC system is ideal for cool environments like basements. Once the site is perfect, you can assemble the parts required to build your system.

One of the best things about installing a DWC hydroponics system is that it’s quite simple to begin going. Every component that’s needed is easily accessible. But it’s essential to choose the perfect spot first.

A DWC system is ideal for cool environments like basements. Once the location is ideal, you can collect or assemble the components needed to create your system.

First Stage

You’ll need small pots or baskets for your plants and a medium for the roots to develop. The most popular medium for DWC setups is clay pebbles in individual mesh pots, while alternative options exist. These pots must fit into holes in the container top, a floating piece of foam, or some other configuration that keeps them in position and keeps the root system continuously submerged.

Click here to buy the pots

Second Stage

Assemble the oxygen-producing elements. Standard parts of DWC system configurations include an air pump and a water aerator, such as an air stone or similar device. The system’s water content must be considered when sizing the air pump.

Generally speaking, the pump should be able to move one liter of water per minute for every gallon of water. Therefore, a 5-gallon system should include an air pump that can pump at least 5 liters per minute. One liter per minute is created in an hour to make sixteen gallons.

Therefore, a pump that can handle at least 80 gallons per hour is required for a 5-gallon DWC system. Additionally, you’ll need the appropriate tubing for the pump and air stone/oxygenator. Finally, it makes sense to have monitoring tools on hand.

A few essential monitoring tools are necessary to build an efficient system management configuration. The three essential tools you should have are an EC (Electrical Conductivity) meter, a pH meter, and a thermometer. You can purchase pH and EC meters alone or in a dependable combo.

This will allow you to gauge your water solution’s pH, temperature, and quantity of available nutrients. Understanding these elements is essential for effective system administration.

deep water culture

Pros and Cons of the DWC System

DWC systems have many benefits, but like every system, they have some drawbacks. In light of this, let’s examine DWC’s benefits and drawbacks so you may be prepared and aware of what to look for.

Benefits of the DWC System

Here are the benefits of the DWC system:

Scalability

Because of their versatility, DWC systems can be applied to both small-scale projects and large-scale commercial settings.

Affordability

Installing a DWC system can save a lot of money. Many necessary parts are easily obtained at reasonable prices or recycled from everyday household objects.

Low Maintenance

If configured correctly, a DWC system requires minimal maintenance. Usually, routine pH, nutrient content, and water level monitoring are all that is needed.

Drawbacks of the DWC System

Here are the drawbacks of the DWC system:

Difficulty with Rooting Vegetables

Root vegetables do not grow properly in DWC systems. However, routine pH, nutrient content, and water level monitoring are usually sufficient. 

Risk of Drowning Roots for Beginners

Hydroponically balancing the water and air supply to the roots can be difficult for novices, which increases the risk of “drowning” or root rot.

Constant Power Requirements

DWC systems require a consistent electricity supply to operate the air pumps that supply oxygen to the plant roots. A backup power source makes sense because power outages can cause serious problems.

Conclusion

Learning about hydroponics can be a thrilling experience. DWC systems are a fascinating avenue to explore whether you’re a novice gardener looking for new challenges or an accomplished gardener looking for something new.

Setting up your DWC system may be a fun and satisfying DIY activity if you have the necessary skills and tools. Once it’s operating, you can enjoy the fruits of your labors and recognize how environmentally beneficial hydroponic farming is.

Recall that learning is a continuous process. With each challenge you conquer, you will become a more skilled hydroponic gardener and get closer to mastering your DWC system.

4×4 Grow Tent Setup: Detailed Guide 2024

4x4 grow tent setup

People love gardening in their houses, but this interest is increasing daily due to advanced equipment entering the industry. Grow tents are also one of them, and they help gardeners cultivate their plants in specific conditions. Cannabis lovers recommend using a grow tent to get the most out of weed plants.

A 4×4 grow tent is common among users for this purpose. This blog will discuss a 4×4 growing tent and how to set up one for you in your house.

What is a 4×4 Grow Tent?

The name “4×4 grow tent” refers to areas where the plant grows inside a home. It provides 16 square feet of area in total. This tent has other equipment like lights to provide required sunlight, ventilation to decrease humidity, and AC to maintain the temperature. Heavy-duty canvas fabric is used in the manufacturing of these growing tents. This area offers several benefits:

Controllability

The 4×4 tent offers enough space and an effective environment to cultivate multiple plants and understand what’s working and what’s not. It is beginner-friendly and also works well for experienced growers.

Efficiency

4×4 grow tent gives you more growth when you do basic with proper planning, and you can maximize your yield in no time.

Variety

It gives you a variety of options not only for cultivating plants but also for testing different setups, which include hydroponics, soil-based solutions, and others.

Click here to buy our soils

What is 4×4 Grow Tent Yield?

The term “4×4 grow tent yield” describes the number of plants grown inside a 4 by 4 grow tent by maintaining variables such as humidity, temperature, and light. It also depends on plant types, cultivation techniques, quality of nutrients, and, in the end, the grower’s skill. You can get between 8 ounces and 2 pounds by using it properly.

4 by 4 grow tent

Expected Yield of a 4 x 4 Grow Tent?

Using the right equipment and the right plant can increase the yield of the 4 x 4 grow tent. If everything is done correctly, growing plants inside a tent can yield 4 to 8 ounces per plant. You must complete the setup to get the most out of your tent.

4X4 Grow Tent Setup

Different types of tents with various features are available on the market. You must research your needs and goals to select the best one for you. Here, we discuss some common considerations before setting up your growing tent.

Selecting Location

Before setting up your tent, you should first focus on the location. When choosing your area, remember that tents come with temperature control tools, but your location should provide greater benefits from the outside. Another important thing is to look for power outlets because tents need electricity for lighting and temperature control.

Assemble Tent

Every tent comes with an instruction manual for correctly setting it up. The tents should be lightweight and have quality metal poles to give them the power to stand straight. The type of fabric also matters, and polyester and polythene are recommended.

Lightning

It is universally acceptable that plants need sunlight to grow. Direct sunlight is a natural phenomenon, but when growing inside, you must make extra effort to provide the sunlight required to grow naturally.

Tent manufacturers advise you which type of Light you should use in a tent. In general, you should use LED, HID, and CMH lights according to the size of your tent.

Ventilation and Air System

A tent can adjust in a small space where a common ventilation and air circulation challenge arises. Growth tents usually have a proper ventilation system, including fans and exhaust fans, to manage the humidity and temperature level inside the tent. It is preferable to consult with your tent manufacturer and set up fans by considering the area of your tent.

Setting Up Plants

One last step in growing tent setup is setting up plants. It’s up to you which technique you will use to cultivate plants. There are several methods, like soil-based and hydroponics.

When you grow a plant in soil, choosing specific soil, nutrients, and watering systems is essential. A proper irrigation system with timers is needed if you are using hydroponics.

4x4 grow tent yield

How Many Plants You Should Grow in a 4×4 Tent?

There is no specific answer to this question; it depends on several factors, including plant type, the technique used to cultivate the plant, and the space available in your growing tent. Hydroponics uses less space than the soil-based method. Here are some techniques:

Sea of Green Method

This technique is widely used among gardeners because it is easy to use and grows plants in small tents, exceeding expectations. In the Sea of Green technique, you combine plants close until they reach the vegetative stage. Generally, you can grow 32 plants in a 4×4 grow tent with an expected 1-1.5 lbs yield.

Screen of Green Method

This technique is effective but requires more space. You must make a grid above the plant’s root. Grids should have compartments to distribute space to the plants. The best size is 4- 6 squares for each plant. The average yield from this technique is 1.5-2 lbs.

Conclusion

A 4×4 grow tent is perfect for beginners as it is easy to use and set up. It also comes with various options so you can test multiple plants simultaneously. If you have any questions, let us know in the comment section.

How to Clone a Cannabis Plant: Step-by-Step Guide

How to Clone a Cannabis Plant

A cannabis clone is a part of the plant that is cut off from a weed plant known as the mother plant. The cloning cannabis has a gene similar to the parent plant. The regular size of the clone is 6 inches.

After the clone of the cannabis plant has been cut off, the root cube is used to grow cloning weed by putting good growth on the root. Once the root is grown, it is kept inside the pot or on the ground and can grow like any weed plant.

Reasons for Using Cannabis Cloning

Cuttings from cannabis are more advantageous than growing the whole cannabis plant. They save a lot of time when it comes to growing. Cannabis clones don’t need seed germination to grow. It only needs to root out, which takes less time compared with the duration of cannabis plant growth.

Cloning weed also has the advantage of leaving a lot of space. When using seeds, it is essential to grow more plants and identify and remove male during their copulation.

There is a risk of seed germination failure, which requires extra space for potential plants that may not turn into complete plants. The reason that cloning weed is helpful is that both the plant and its clone have the same genes and abilities.

Suppose you want a plant with desired characteristics, such as effects, smell, appearance, etc. You can get its clone and place it for further growth. Cloning is part of the plant, so there might be an opportunity for the clone to be ruined due to environmental conditions, which can be detrimental. 

Find Out: Best Cannabis Strains To Grow Indoors

cloning cannabis plant

What is Cannabis Mother Plant?

It is a complete plant in which its part, a clone, is removed. Its plant health should be improved to keep the clone healthy because both have similar DNA. If plants have bad health, then their clones will have the same. The condition of the clone depends upon its parent plant. When part of the plant is cut off, its parent plant is still in the growing process.

The clone converts itself into an organism with sex organs of both genders, damaging the flowering plant. Cuttings from cannabis plants are the reason that fewer growers use the progenitor plant. For this purpose, capacity and tools are required.

The proper method of cannabis cloning is to take the parts of the parent plant during the growing stage and, after it has been taken off, continue the growth of the plant till the flowering stage. The clones can also become a whole plant, and their clones will be taken off.

The plant, from the first generation to the generation of its grandchildren, will have the exact copy as the same DNA runs in its family. This means similar plants or clones of different generations will have similar tastes, effects, smells, etc. The clone assures that there will be the existence of females only starting from the clone. This eliminates the need for seed cultivation, mating, and removing males.

Tips for Selecting a Mother Plant

The plants and their clones are connected with the DNA, so they depend on the mother plant. To obtain a good clone, you must have a good plant. Growers looking for the qualities in parent plants are mentioned below:

  1. Huge yields
  2. A plant invulnerable to pests and other diseases
  3. It must have a strong smell and good flavor
  4. A strong plant has the energy of a growth
  5. Dense trichomes

7 Steps for Cloning a Cannabis Plant

1. Select a Good Conditioned Plant

As we have discussed, both are similar. Good-conditioned plants, such as strong and healthy plants, give the same characteristics to their clones. The purpose is to find the accurate parent plant.

Inspect the nodes in the plant that are like long hair. If there are such nodes, it must be a female plant, and these plants, whose life is 4-6 months old, are perfect for cloning. If not, look for a plant that is two months old or less than that. Actual breeding plants have less resistance to diseases than hybrid plants. Select a plant that can save time and energy.

2. Separate the Clone from the Mother Plant

Before separating, the plant must be cleaned to ensure the health of its clone. Remove germs from the isolation tools. Use them carefully to avoid minor damage to the plant.

Select the lower or look for the healthy part of the plant for cutting instead of aiming for the top part because the top branch is older than the lower branch, so the top branch will easily get damaged. Cutting the bottom branch will facilitate cloning.

3. Place the Bottom Part of the Clone in a Rooting Hormone

After completing the above step, place the clone in rooting hormone or water in no time; otherwise, embolism will occur. Embolism can happen due to the formation of air bubbles in the system of vessels in the stem, blocking the transpiration and causing hanging in the cannabis plant.

If the clones absorb the air for a long time, you have to cut the clone again underwater. This is mainly suggested for taking care of the clone.

cannabis cloning

4. Growth Medium for Clone

After the previous step, put the clone in a growth medium. A growth medium can be soil, water, rock wool cubes, etc. Softly push the clone towards the surface of the growth medium and firm it.

Rockwool cubes are primarily used for their water and air-holding capacity. They make it simple for the clones to place in. Fertilizers can harm the clone no matter what medium of growth you use, so ensure not to use them.

5. Use Water and Light for Clone

Water slowly or use less water on clones to give them moisture. The important thing in this step is to ensure the clone is moist. Spraying water will help to provide nutrients to cloning cannabis as it does not have roots yet.

Giving the clone light is essential for rooting and growth. Ensure sufficient light is provided to the clone plants, meaning there should be no shortage or excessive light. Sunlight has more power than artificial lights.

6. Maintain Humidity and Temperature

These two things are essential for providing health and making the plants survive. To give a certain amount of humidity, which can be suitable for cloning cannabis, you must set the humidity to 95%-100% for two days and reduce 10%-15% till the day of the transplant.

To speed up the rooting, the temperature should be 75 to 80 Fahrenheit, and the ambient temperature should be 5 to 10 Fahrenheit.

7. Transferring the Clone

Ensure that all the steps mentioned above are completed. Before changing the location of the clone for placement, check whether there is a mistake. Once everything is clear, you can place it in a different soil and water it peacefully.

Conclusion

To sum up, cloning cannabis offers growers a reliable method to copy desired genetic traits while bypassing the uncertainties related to seed germination. By choosing healthy plants and carefully propagating clones, growers can constantly grow female plants, eliminating the need to mate or discard males. This can save a lot of time and resources, leading to efficient and effective cannabis production.

Cannabis Overwatering Signs: How to Fix It?

If excessive water is provided to weeds, what can happen? Providing more than the amount of water needed for the soil can prevent oxygen from reaching the plants, which won’t be able to absorb nutrients. Roots give plants oxygen, and water dissolves oxygen. So, excess water can be harmful to the plants.

The cultivation of cannabis plants relies on the condition of the soil. Plants get ruined because their roots need oxygen, and excessive water vanishes the oxygen.

Overwatering Weed Appearance

The following are the overwatering signs of cannabis:

1. Leaves That Are Limp and Soaked

Transpiration and photosynthesis can quickly occur with the help of water molecules in the leaves. Consuming too much water can increase leaves’ weight.

Plants can discharge water vapor by absorbing too much water, creating a growth problem for the plant as there will be no water molecules after it is emitted from the plant in gaseous form.

Read our new blog: What Tools do you need to grow weeds?

2. Leaves That Are Torn Apart

Excess water can cause the leaves to fall off because it can cause drooping when water molecules are added, which is more than enough. Furthermore, the soil in the grow tent absorbs more water, increasing humidity.

3. Yellow and Curled 

Roots can be suffocated due to overwatering weeds. For enhancing the inhalation of oxygen and improving water quality, people who engage in hydroponics use dry coco medium and air stone respectively.

Roots use oxygen more than the amount of nutrients when the roots have a hard time surviving, leading to having less amount of chemical elements such as iron,potassium and phosphorus. That’s why you notice brown and yellow leaves because these leaves encounter this kind of an issue.

Check our Growth Shot to grow cannabis indoor

4. Plants Prevented from Growing

This issue can be created by having nutrients that are less than the plant needs and by photosynthesis happening at a slow rate. Overwatering weed plants harms their yield because it minimizes the development of bud sites.

5. Saturated Soil

Inspecting the soil gives an effective method for detecting signs of overwatering cannabis plants. A mushy appearance shows the poor drainage, which leads to excessive water.

A soil moisture meter can gauge the soil moisture level accurately. This device uses electrodes inserted into the soil to detect the soil’s condition.

Check our another product Coco Core Grow Bags

What are the Causes of Cannabis Overwatering

What are the Causes of Cannabis Overwatering?

The following are the causes of cannabis overwatering:

1. Water Absorbed More Than Adequate Amount

Signs of overwatering cannabis plants can be revealed when plants consume too much water. This makes the soil wet and causes plants to lose a lot of water.

2. Container’s capacity

A small container is suitable for healthy plant growth. Using a large container can easily cause overwatering.

3. Poor Drainage

Unable to drain a certain amount of water can cause overwatering. If not drained, the amount of water available in the soil will remain the same, which can suffocate the root.

Fixing Excessive Water Techniques

The following are the tips for fixing overwatering:

1. Dry the soil

This is one of the best ways to fix overwatering. Plants should be placed under the sun to dry, which can reduce excess water. The water can be reduced by converting it into gas for emission.

2. Resurrect the soil by nutrients usage

Nutrients play a crucial role in the growing process of plants because they facilitate the transportation of nutrients and the growth of new foliage. Excessive watering causes these water-soluble minerals to be washed down to the bottom of the plant container.

Once the excess water starts to drain from the soil, nutrients begin to vanish. After the soil has been dried, add nutrients to develop healthy plants. This will take a few weeks to see the enhancement in the crops’ appearance.

3. Add Microbial Mix to the Soil

Microbes are small organisms in the soil. These organisms let the root absorb nutrients, which can lead to beneficial plant effects. The growth of microbes inside the soil can be safeguarded by microbial mix. This allows the microbes to absorb numerous nutrients, which induces the plants to grow healthily.

Can Overwatered Weed be Recovered

Can Overwatered Weed be Recovered?

Yes, the weed can be recovered if the overwatered plants last no more than 5 to 6 days. All you have to do is remove the plant from the spot where it was overwatered and place it under sunlight for the plants to dry. If the plants take more than a week to dry, they will be impossible to survive and extremely harmful compared to other plants.

Conclusion

Recognizing signs of overwatering cannabis plants is crucial for learning excessive moisture levels. Symptoms include stunted growth, wilting leaves, and brown and yellow leaves. Being aware of the overwatering signs of cannabis is essential to believing in the existence of overwatering. With this knowledge, you will be able to manage plants.

The best way to know whether a plant is overwatered is to use a soil moisture meter, confirming the amount of water in the soil. Growers will take precautions on plants.

6 Reasons to Use a Grow Tent for Indoor Growing

6 Reasons to Use a Grow Tent for Indoor Growing

Have you ever considered a tool that is good for plant growth? What is a grow tent? Why are good tents worth it? Information about tents for growing plants and the benefits of using a grow tent will be discussed in this paper. 

What is a Grow Tent? 

It is also known as a grow room. It is a collapsible tent that is used to produce better plants. It consists of fabric and plastic to adjust the environment and protect plants inside the tent. Each tent has a different capacity, feature, and cost.

Tents can help give plants a sufficient environment and stop external factors from reaching the plants, such as molds and pests. Light and air circulation systems are the main sources of maintenance for the environment. This means plants outside growing tents can be more harmful than those inside.

The tent can be used outside and anywhere inside the house. Most tents used for developing healthy plants have a silver reflective fabric. With the help of air circulation systems, the odors of the plants can be abolished throughout the year. Soil and hydroponics can be used as a medium for plant growth.

Furthermore, growing plants in a smaller tent can diminish the chance of them being attacked by pests and other diseases. The smaller the space, the higher the chance of the plant’s safety.

The tent uses sufficient energy and water for plants, which is why plants inside the tent grow better than those outside grow tents. Using a tent is the best way to enhance plants’ health.

Read our new blog: What Size Grow Tent Do I need For 4 Plants!

Reasons for Using a Grow Tent

Reasons for Using a Tent

The reasons to use a grow tent are as follows:

1. Space for Plants

If you want to grow better plants for personal and commercial purposes, you need a space for the plants to grow. This is the first and most important reason for growing plants.

Many people don’t have space. So they use tents to provide space for the plants. It can either fit in a closet or a room.

You can also use your house to keep the equipment for producing plants, such as fans, lights, filters, etc. This is very useful for those people who have trouble growing outdoor plants or don’t have space to grow.

Check our new blog: Grow Tent Mushrooms

2. Plants Grown Comfortably in Every Season

The tent doesn’t permit plants to have a harmful effect due to seasonal changes. That means no matter the season, you can grow plants anytime without worrying about the plants being rotten. The tent has a seal that protects the plants from different seasonal changes.

The plant will consume the same atmosphere in any season. The sealed tent can also come in handy to increase the difficulty of the discomforting smell to banish from the tent. It saves you from numerous complaints of illegal activity (according to the law in some areas) by preventing leakage.

Read: 4X4 Grow Tent Setup 

3. Preventing of Pests

Another reason for setting up the tent is to avoid pests. The chances of outdoor plants getting attacked by pests are high because pests can be anywhere in the open world. So, people use tents, making it difficult for the pest to approach the plants. Keeping the plants in a certain closed room or closet can safely grow the plants.

4. Ventilation System

The ventilation system is perfect for our tent in terms of keeping good air circulated. Outdoor plants cannot consume constant good air as the temperature changes, making it difficult for the plants to grow healthy.

For the solution to this problem, the ventilation system uses a fan and carbon filter to give good air and enclose the odors in a filter respectively. These two work together to provide good air circulation.

Using a Grow Tent for Indoor Growing

5. The Correct Light

Tents can tell you how much light the plants should consume for better results. For example, a small tent requires 150 watts of high-pressure sodium grow light or 600 watts of LED light. For a larger tent, you need a dual 600-watt tent. The only way to know the amount of light plants need is to determine the size of the tent. Each size has a different adequate amount of light.

6. Easy to Use

Everyone can use a tent to develop plants easily. It doesn’t require too much effort to set up the tent. It makes it easy to disassemble, relocate, and use the tent again.

Mostly, you don’t need tools or skills to grow healthy plants. The only easy, unskilful, and peaceful way to grow plants is to use a tent—no hard work.

Conclusion

Are good tents worth it? Therefore it is. Nowadays, it’s hard to develop healthy plants and there can be any issues related to that. To make it easy for the proper growth of the plants, a tent is used. Tents have different factors that can help to grow healthy plants.

A tent acts as a protector of the plants’ health and also adjusts the environment according to the satisfaction of plants. It is easy to set up, disassemble, move, and reuse a grow room.

What Tools Do You Need to Grow Weeds? Complete Guide

Picking out the right kind of equipment when it comes to growing cannabis in an indoor environment is a tricky business. Anyone can do so with a little research and awareness. In this blog, you will be educated about all the supplies to grow weed and will be given useful tips.

Check our Support Items for growing weed!

Tools Needed to Grow Weed

1. Suitable Ground

If you are well aware of the hydroponic system, well and good, you may jump straight to the next item. However, if you are opting for soil to cultivate cannabis indoors, then you need to stop doing that. It is advisable to choose light and well-draining soil.

Aim for a pH level of around 6.0 (but not below 5.8 or above 6.3). You must ensure that the soil you use is rich with essential nutrients, i.e., phosphorus, nitrogen, potassium, and micronutrients.

Avoid using fertilized soils while growing auto-flowering strains. They do not need nutrients initially; they only require them throughout their growth period. These flowers are easily identified due to the “auto” in their names, such as Auto Gorilla Glue, Auto Bruce Banner, or Northern Lights Automatic.

Those with experience with soils and fertilizers and know how to create soil blends at home using vermiculite, peat moss, compost, and perlite can make their own soil mixes. For beginners, the tip is to stick to a quality-made potting mix.

grow weed tools

2. A Grow Tent

If you’re growing weeds in a tent, you might need to reconsider your gardening strategies. Remember that your growing space matters a lot to achieving a yield. The humidity, temperature, lighting, and air circulation all must be balanced. Using a grow tent simplifies this task and ensures a smooth process.

Additionally, growing weed in a tent is also helpful due to its portability. It can be transferred desirably.

3. Pots

Before growing cannabis, sufficient and appropriate space is necessary. Farmers who are experienced in this field prefer bigger pots. They help them grow better and nourish more rapidly, as they provide enough space for the roots.

Moreover, agriculturalists avoid pots made of plastic, as they absorb a great deal of heat and hinder the growth of weeds. Always choose fabric pots, as they are permeable and do not trap excessive heat.

4. An Exhaust Fan and Carbon Filter

An exhaust system is essential for indoor weed growers. A fan extracts hot air and airborne­ particles. It channels them through a filte­r, removing contaminants. This clean air gets redirected away from the growing are­a, preventing pollutants from accumulating there­.

When marijuana plants grow, the­y make gases called VOCs. VOCs are­ toxins that mess up indoor air. And, boy, they sure sme­ll bad. VOCs come from terrenes, which plants usually make.

A properly insulate­d grow tent can trap VOCs. But the VOCs won’t disappear by themselves. This is the reason why you would want a carbon filter. It not only helps in getting rid of odours but VOCs as well. Take a 4-inch long carbon filter and an exhaust fan.

5. Grow Lights

Light is one of the sources plants need to nurture. Similarly, cannabis also needs suitable light to cultivate. You just need a light source that can be 18 hours long. What comes to mind is an LED panel or a Sodium bulb with high pressure. Along with light, it also gives a bit of warmth to prevent weed plants from drying out.

Read our new blog: 3 reasons why Full Spectrum Light is Good For You!

growing tools

6. Thermometer and Hygrometer

Extreme temperatures can kill a cannabis plant. Therefore, farmers keep their check and balance tools in hand at all times. It is very important to regularly check the weed plants during their growth cycle.

A thermometer works similarly for cannabis plants as it does for humans. It inspects whether the room temperature is maintained during their growth in a closed space.

On the contrary, hygrometers are responsible for maintaining marijuana’s moisture. When weeds grow in a closed environment, such as a grow tent, they risk drying out. Farmers need these instruments to avoid human error.

7. pH Meter

To balance the nutrients in your soil, you need to be vigilant about your pH level. It helps regulate the acidity and alkalinity of your soil. The pH meter helps detect any uneven distribution of nutrients in the soil.

Wrap Up

There are many possibilities for growing weed. Despite this, our seven most preferred techniques are mentioned above. If you know about any other useful piece of equipment, feel free to recommend it to us!

8 Best Herbs to Grow Indoors

8 Best Herbs to Grow Indoors

We use herbs in our daily lives in different kinds of products, so the demand for herbs is usually very high; that’s why gardeners often look for the best herbs to grow indoors in pots. This blog post will discuss indoor herbs to grow inside your house.

What are Herbs?

Herbs are plants with beautiful smells and different odor properties. Growing herbs indoors is more challenging than it seems. Nowadays, herbs are used in many industries, the most famous of which are fragrances, pharmaceuticals, and flavors.
Herbs come from the leaves of plants. People often mix spices and herbs, but they are different.

Difference Between Spices and Herbs

Spices come from roots, dried leaves, and seeds of plants or the outer layer of trees. Some examples are fennels, lovage, and mace. On the other hand, herbs are made up of the leaves of plants that are adorable and have longer freshness.

Check our super soils to grow the healthy herbs indoor! Click Now!

Best Herbs to Grow Indoors

Best Herbs to Grow Indoors

1. Basil

Basil is one of the famous herbs due to its versatile nature. It can be used in salads, sauces, soups, and other daily food products. The scientific name of basil is “Ocimum basilicum.” A proper environment is needed to grow these herbs in indoor pots.

Put it in a large pot because of its big leaves. When its leaves reach seven inches, cut them and keep them away from quick growth. Aside from these general uses, basil is also used for medical purposes as it contains antioxidant and anti-inflammatory elements.

Read our latest resource: Cannabis Overwatering and How to fix it

2. Catnip

If you focus on its name, it must come to your mind that this herb is related to pets. If this is what you’re thinking, you’re right. Catnip is one of the indoor herbs used to grow. Catnip has a unique compound in its stem and leaves named “nepetalactone.” Catnip’s scientific name is “Nepeta cataria,” and it is primarily found in Europe and Asia.

It is experienced that it changes your cat’s behaviors, such as licking, rubbing, and rolling. It is easy to grow as compared to basil and other popular herbs.

3. Chive

Chive is another popular plant similar to onion and garlic. It is easy to grow, needs average water, and survives in minimum sunlight. It has long leaves, making it beautiful, and often used in salads and soups.

Chive is mainly found in Europe and Asia, and its scientific name is “Allium schoenoprasum.” Gardners love purple-pink flowers when they bloom at the right time.

Find out: Best Weed Strains to try in 2024

4. Lemon Balm

Lemon balm has a unique lemon scent and flavor, which is why people call it lemon balm. Scientifically, lemon balm is called Melissa officinalis.

It is mainly used to add a surprise taste to beverages and desserts, as seen in TV shows and movies, and is also used in salads, sauces, and soups. It needs a small amount of fertilizers, is easy to grow, and can survive in natural sunlight.

5. Oregano

Oregano is usually used to season several dishes, especially in Italian and Greek cuisines. Because of its unique smell, people love to see it at their parties and special gatherings. It is used as a dried herb, and its leaves should be crushed before adding to dishes.

Apart from its normal use, it is also used in the medical industry as it has antimicrobial properties. It needs less than average sunlight and low water to survive naturally. It is scientifically known as “Origanum vulgare.”

Parsley

6. Parsley

Parsley comes in two types: curly type and flat-leaf type. Flat-leaf parsley has more culinary value than curly-type parsley. Parsley covers many products, including salads, soups, sauces, marinades, and seafood.

Parsley is valuable in the medical field as it contains vitamins A, C, and K. It is beneficial with a proper diet. It is used fresh and dried in both states. The scientific name of Parsley is “Petroselinum crispum.”

7. Rosemary

Rosemary is known for its needle-like leaves and extraordinary fragrance. Its origin is Mediterranean, and its scientific name is “Rosmarinus officinalis.” Rosemary is used in dishes like roasted meats, grilled vegetables, and breads.

It is also used with other spices and herbs like thyme and oregano. When grown inside a house, its beautiful flowers give your garden an attractive look.

8. Sage

Sage is known for its gray-green leaves and fuzzy texture, distinguishing it from other leading and popular herbs. It could be best to grow it inside your house as it is used in vegetables, meats, sauces, and salads. It is also good to go with other herbs like rosemary and oregano.

It is used in medicines known to improve cognitive function and digestive health. To grow properly, it needs an excellent drainage system and average sunlight.

Conclusion

This guide will help you to select suitable herbs according to your surroundings and requirements and also tell you how to grow herbs indoors. If you find this article interesting, give your feedback in the comment section.

8 Most Expensive Plants in the World 2024

8 Most Expensive Plants in the World 2024

Gardners who want to grow different types of plants in their home often search for unique, high-quality plants that increase the beauty of their greenhouse area. As they demand quality, plant prices go higher than expected. Multiple plants are unique in their shape and growth nature, but in this blog post, we will discuss the most valuable plants in the world.

1. Variegated Monstera Varieties

The world’s first and most expensive plant, Variegation Monstera, is unique because it has different colors in its leaves and some patches and stripes of creamy and yellow color.

This is an expensive plant because of its nature, the requirement for extra care, and the need for a suitable environment. The price of small cuttings starts at a hundred dollars, but the larger monstera plants sell for thousands of dollars.

Variegated Monstera Mini

2. Variegated Monstera Mini

The mini Variegated Monstera is small compared to standard Monstera plants. Other characteristics remain the same, such as the same creamy and yellow color patches on the leaves. Mini Monstera is often called a different species of monstera deliciosa called Rhaphidophora Tetrasperma.

The price of a mini Monstera depends on the number of leaves in it. According to sources, a mini Monstera with four leaves sells for at least $8,000, and one with nine leaves sells for $27,000.

3. Ancient Bosnai

It is also named the “800-year-old bonsai tree”. Bosnia is the method of putting trees in small containers and taking extensive care of them for an extended period; by a long period, we mean that generations take care of it.

For example, a Japanese bosnai tree named “Jomon Sugi” is about 800 years old. Many of the most expensive bosnai plants are available in museums and private collections in Japan. One exhibition sold out a bosnai tree for $1.3 million.

4. Shenzhen Nongke Orchid

Shenzhen Nongke is the company that made these hybrid orchid plants in China. They are famous and in demand for many reasons, but their beauty is the most important reason people buy them for millions of dollars.

This most expensive plant in the world takes eight years to grow into its current shape. In 2005, the Shenzhen Nongke orchid plant sold for 1.68 million yuan, or $200,000.

5. Monstera Oblique

Due to the unique leaves and their size, the large Monstera Oblique is more distinctive. It is also known as “Swiss Cheese Vine” because of the holes in the leaves. This most valuable plant in the world is rare to find. Such plants demand a unique environment and care from the owner. According to the gardening industry, large Monstera Oblique sold out for over $20000.

Philodendron Tortum

6. Philodendron Tortum

Philodendron Tortum is one of the most valuable plants for growing. This plant, with its unique shape and thin leaves, is found in tropical rainforests of Brazil. It’s not common among gardeners because of the space they demand for better growth, which results in a high price. Its average price is $500 for each plant.

7. Philodendron Pink Princess

Plant lovers highly appreciate Philodendron Pink Princess for its unique color, “Pink.” The size, vegetation area, and seller location impact the price of this plant.

These plants sold out fast as compared to other in-demand plants. If you want to buy one for yourself, it is best practice to check multiple sellers and select the best one for your home.

8. Monstera Esqueleto

Monstera Esqueleto has holes of different sizes in its leaves. Its size is about 3 feet; it could be less, but it’s its ideal length. Due to its large leaves, it demands extra sunlight and space.

It is always in demand, and its usual price is over $600. Remember, it’s not fixed, so that you can negotiate with the seller.

Conclusion

To buy these plants, don’t just check out one seller; instead, always try to find multiple sellers to get a fair price. If you didn’t see more than one and genuinely want your desired plant, go for it and make it part of your home.

How to Grow Weed in Your Closet

How to Grow Weed in Your Closet

An inexperienced grower asked, “Can cannabis grow in the closet?”

The answer is yes, and it can be grown properly. Growing weeds inside the closets is the same as weeds in the grow room. To have good cannabis growth in the closet, the requirement of a suitable environment for growing cannabis in a closet is the same as for growing a tent. It can grow perfectly if you put reasonable effort into caring for it.

An empty closet can come in handy. This can help you conceal the cannabis plant from everyone. The closet is functional, and other almirahs can also come in handy. All almirahs have the same method for growing perfect weed. The closet size should be perfect according to the size of the plant you intend to grow. Before we jump on how to grow weed in a closet, let’s first look at its aspects.

What is a Closet Grow?

It is a closet where plants are kept for growing. Numerous people don’t have space in their homes for plants. So they use the closet for this purpose. It helps to grow faster and healthier. You can purchase an empty closet or use the one you aren’t using to grow weeds indoors.

Read our new blog: Why you need a humidfier for Grow Tent

1. Closet Grow

A closet used for growing plants and has a small capacity.

2. Grow Tent

A grow tent is used for growing plants, and the capacity depends upon the size of the tent.

3. Grow Room

A room where plants are kept to grow, and most grow rooms are larger than grow tents and closets.

Advantages of Grow Weed in Closet

Advantages of Grow Weed in Closet

1. Huge Money Saver

If you want to grow cannabis plants indoors, then you might use the grow tent, but the worst part is the requirement: it’s a considerable cost spent with money.

Growing weed in the closet is the best way to save money. Another reason the closet is cheap is that no high-level technologies are required for growth. Light and a fan should do the trick.

Find out our Support Items to Grow Weed Indoor!

2. Useful in Hiding

It is helpful for a person in a country where keeping cannabis plants is against the law or for concealing from others. The closet is beneficial because it has a door that covers the cannabis plant, making it difficult for others to observe.

3. Controlling Plant Growth

It is easy to take control of the growing of plants in a closet. With this authority, you can get excellent results in plant growth. Authority over plant growth includes the temperature, humidity, light intensity, etc. If you compare places for controlling the growth of weed, the closet is the easiest because it has the smallest space.

The probability of controlling the growth of the cannabis plant is reliable in space. The smaller the space, the more the chance you get to control.

Check our Liquid Plant Food to boost the weed growth!

Number of Possible Cannabis Plants Grown in a Closet

You can grow indoor weed in a closet as much as you want, according to its size. The bigger the size, the more plants grow. Similarly, the smaller the size, the number of plants reduces.

We suggest growing not more than two plants of almost every size in a closet. Growing more than two plants will lead to the imperfection of growth due to a particular space in the closet.

Factors Required for Weed Grown in Closet

Factors Required for Weed Grown in Closet

This is where your interest will develop. There are so many factors that contribute to growing weed in a closet, but a few are mentioned below:

1. Space in Closet

Inspecting the space in the closet is the first and most important step before proceeding. Think about a closet of a specific size that is sufficient for the size of growing weed. Get a bigger closet if you want the space to grow more plants.

This can not only increase its capacity but also make the setup easier. Make sure to check its length and width for proper cannabis plant growth. Height is required to set up the lights. So be sure to get a closet whose height can fit the plant’s growth and the lights.

2. Lights for Growing

Light is the main source for growing indoor weeds. A small closet can provide sufficient light for small plants. Specific intensity and particular kinds of light are required for healthy growth.

The best way to grow weeds in a closet is to use LED lights that produce the right intensity for a specific plant. LED lights contain the UV-B spectrum, something that plants need. Lights other than LEDs don’t have a UV-B spectrum. So these lights are useless to the plants.

Normal LED lights don’t discharge a lot of heat. Smart LED lights are the best option for providing both heat and UV-B spectrum light. They have three benefits: temperature, intensity, and light spectrum. Each growing stage requires different sorts of light.

3. Spot Types for Growing

When you have to place seeds for growing plants, you have two options: to place them on soil or hydroponics.

If you are knowledgeable about hydroponics, you can use something similar to hydroponics to grow cannabis in the closet. Hydroponics has an advantage because it helps plants consume the required nutrients. This can lead to growing plants at a fast pace, and this can develop big flowers.

Soil can also be used in this situation. If the soil is of high quality, it can give plants enough nutrients. You won’t be anxious about the excessive amount of nutrients a specific plant consumes. Fertilizers and organic supplements are the perfect ingredients to improve soil health. In terms of soil, a growing pot in a closet is the best solution.

4. Watering Routine

Water is also a main source of improvement in plant growth. Plants are thirsty like humans, so they need water to live. Plants need an ample amount of water to consume. To ensure that the exact amount of water is provided to the plants, there should be no shortage or surplus of water. This can block the growth process and negatively affect the plants.

To water the plants in the closet, check the closet size to determine the adequate amount of water. Providing less or more than the exact amount needed will become impossible.

5. Controlling of Odor

Cannabis has a discomforting smell, and the smell increases as it starts to grow. You need to take action to control odors, and the best way to do that is by using a carbon filter, which attracts the smell and traps it in its filter.

Procedures for Growing Weed Plants in the Closet

Now, after completing the requirements for the factors, you have to use these steps to set up the plants for growing in the closet:

  1. First, clean your closet completely from every side and remove all dirt.
  2. Use the white paint to paint the interior side of the closet and cover the paint with duct tape.
  3. Set up the lights and fans.
  4. Install the carbon filter if necessary for smell removal.
  5. Use a medium (soil or hydroponics) that is suitable for plants.
  6. Experiment to see whether it works fine or not.
  7. After the test goes well, place the growing pot in a closet for the growth of plants.

Wrap Up

If growing cannabis plants is illegal, it would be difficult to grow anywhere except in the closet. Growing weed inside the closet is the best way to make it secure. That means you won’t be able to get caught when you conceal the cannabis plant in the closet.

Another benefit is that it permits you to grow plants faster and healthier. Fill the requirements of the factors and follow the steps mentioned above to grow a cannabis plant.