How to grow Psilocybin Mushrooms in your Home

How to grow Psilocybin Mushrooms in your home

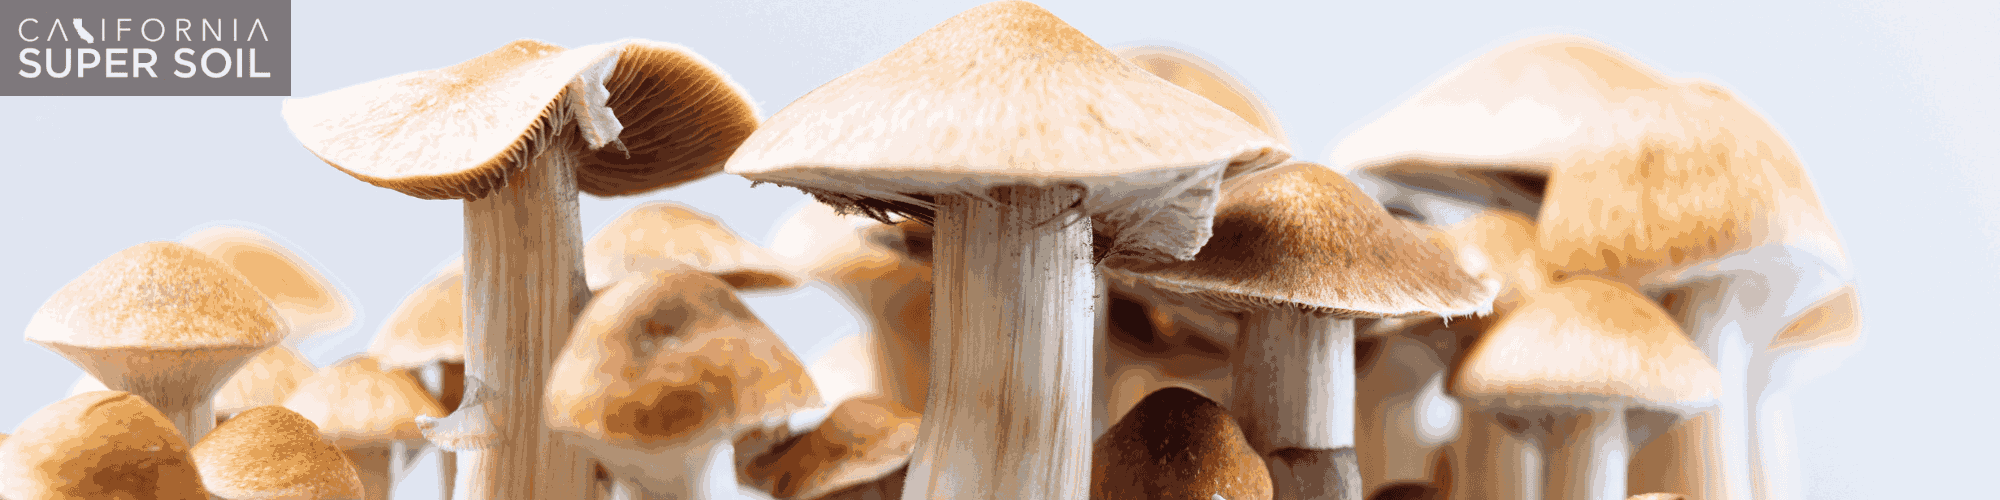
What are Psilocybin Mushrooms?

Psilocybin is a chemical compound that is found in various mushrooms. Their chemical name is 4-phosphoryloxy-N, N-dimethyltryptamine. It is a known hallucinogen that is obtained from various dried or fresh mushrooms, commonly called magic mushrooms. Psilocybin, when consumed, gets converted into psilocin.

They are also medically known as psychedelic drugs that can alter the senses and consciousness of the mind. They have long been used as recreational drugs. Although they occur naturally, advanced technology makes their synthesis possible in labs too.

Types of Psilocybin Mushrooms

Over 180 species of mushrooms contain psilocybin as a chemical component. This includes different species and strains of psilocybin, including Psilocybe cubensis, Psilocybe azurescens, Psilocybe zapotecorum, and Psilocybe bohemia etc.

How Does Psilocybin Work?

The psilocybin typically starts working half an hour after consumption, and its effects could last four to eight hours. They activate serotonin receptors in the brain and thus impact the person’s senses, cognition, and mood. The effect could last longer than the hours mentioned because the consumer loses a sense of time.

The working of psilocybin depends on two factors: the psychological state of the consumer and the environmental setting around them. Thus, their impact can be both positive and negative, depending on these factors and the intensity of the dosage.

How to Grow Psilocybin MushroomsHow to Grow Psilocybin Mushrooms?

People are now widely growing psilocybin mushrooms at home. This reduces the risk of mistaking them for wild or poisonous mushrooms. Growing mushrooms indoors is reliable, economical, and fun for many growers.

They could be grown indoors as well. There are various methods and grow kits available for growing mushrooms. Below is a detailed method for mushroom growth: 

Material Required

  • Mushroom Spores 

First, the mushroom spores of one’s desired strain are required. A mushroom spore syringe is used for this purpose. The syringe contains the spores, which are then sown in the substrate (where the mushroom will grow as well as take its nutrition from).

For the first time, a spore syringe is required. Once the mushrooms are cultivated, the growers can have their own spores from then on.    

  • Substrate (Brown Rice Flour/Vermiculite)
  • ½ or 1 Pint Glass Jars with Lids 
  • An Incubator  
  • A Pot  
  • A Fruiting Chamber
  • Filtered or Spring Water 
  • A Spray Bottle 
  • Alcohol Solution for Cleaning 
  • Measuring Cup 
  • Aluminium Foil  
  • Mixing Bowl
  • Latex Gloves 
  • Micropore Tape 
  • Thermometer 
  • Surface Disinfectant    

Step 1: Preparation

  • Prepare jars by punching holes in their lids using a hammer and nails. The nails have to be disinfected first. 
  • The substrate is prepared by mixing brown rice flour, vermiculite, and water. ⅔ vermiculite is first combined with ¼ cup water, and then ¼ cup of rice flour is added to this mixture per ½ pint jar. This mixture makes a thick cake, from which the psilocybin can directly grow when placed in the fruiting chamber. 
  • Fill half of each jar with this mixture, and sterilize the upper half of the jar by using alcohol. Fill the remaining jar with dry vermiculite. 
  • Seal the jars with aluminum foil by wrapping them tightly around the lid edges.  
  • Sterilize the jars by boiling them in a pot for 60-75 minutes. Make sure that jars are not touching the base by using a small towel or tin foil. This would allow the heat to be distributed properly. 
  • Let the jars cool down.  

Step 2: Inoculation

  • Prepare the syringe by first sterilizing it. Sterilize the needle by heating it with the help of a lighter. Let it cool, and then shake it to evenly distribute the spores within it. 
  • Inject the spores into the jar by putting the syringe through one of the holes in the lid. Insert the proportional amount of the spore solution depending on the number of jars. Repeat the process for all the holes in the lid. 
  • Once it is done, seal the pores with the micropore tap and set the jar aside. 

Step 3: Colonization

  • Place the inoculated jars somewhere clean, at room temperature, or in an incubator to provide the ideal conditions for their growth. Within 2 weeks, mycelium will start to appear. Let it grow and strengthen its hold. 

Step 4: Fruiting

  • Fruiting chambers can be bought or made at home. To make a fruiting chamber, use a plastic container and drill holes all around it evenly. This will allow the air to pass. Next, fill the container with perlite. Run it under the distilled water, but do not wet dry it. 
  • Next, take the mycelium substrate, which is now “cake,” out of the jars and remove the loose vermiculite by running water over them. Let them dry. Then, roll them in dry vermiculite. 
  • Place the cakes in grow chambers by using patches of foil sitting beneath them so they do not touch the perlite. Use a fan to provide optimal air for the mushrooms to grow.   

Step 5: Harvesting

  • Once the mushrooms start to grow and, after 6-10 days, are ready to be harvested, pinch them off the base. Only harvest those that are ready. 
  • Dry the mushrooms to dehydrate them by putting them on a sheet of paper. 

Step 6: Storage

  • Store your mushrooms in a zip-lock bag. If the substrate is not contaminated, it could be used again. 

Conclusion

Growing mushrooms is very easy and fun. However, precautionary measures and risks should be considered. One also needs to keep legal considerations in mind because the sale of these mushrooms is illegal in many states.

Throughout the growth process, cleanliness is the key. Sterilize and sanitize every piece of equipment again and again. Also, avoid growing mushrooms on a contaminated substrate.

High Intensity Discharge Lights for Cannabis Growth

What are HID Grow Lights

What are HID Grow Lights?

High Intensity Discharge (HID) grow lights are artificial lights used to grow indoor plants. They have the same function as sunlight for outdoor plants. They are a kind of light bulb that helps in the cultivation of indoor plants.

They differ in their size and structure from regular light bulbs. They have two electrodes filled with gas within a glass frame. The gas ignites to produce light in these lights. These lights are famous for their impressive brightness.  

HID Grow Light System

It consists of three main components: 

  1. A bulb 
  2. Ballast 

It helps the bulb produce a smooth light and is of two types; magnetic and digital.

  1. Reflector or Hood 

It helps in reflecting the light in our desired area. It could be of various types, e.g., wing, water-cooled, air-cooled, or parabolic.  It is available in different sizes, depending on the size of the area. 

What are the Types of HID Grow Lights?

HID lights differ in type depending on the type of gas used in the bulbs. The two most commonly used HID lights for growing indoor plants are high-pressure sodium (HPS) and metal halide (MH). Different bulbs produce different colored lights depending on the gas used inside them. The choice of a certain type depends on the stage of growth.

High-pressure sodium lights produce a yellowish color that is appropriate to use for plants in their flowering stage. On the other hand, metal-halide lights produce a bluish light, which is best used in the vegetable stage of growth. The shape of both bulbs could differ as well.

How to Choose HID Lamps for Plants

How to Choose HID Lamps for Plants?

Various factors need to be kept in mind while purchasing the best HID lamps for your plants:  

Type of Ballast to Use

Choosing the correct ballast is very important for the proper functioning of the lamps for growing plants. The wattage of the ballast, its dimming ability, and its lumen power should be considered. Digital ballast is preferred over magnetic ballast for its smooth operation, especially with MH and HPS bulbs.  

  • Size of the Cultivation Area 

The size of the bulb and wattage power to be used depend on the size of the cultivation area. The larger the grow area, the larger the capacity of grow lamps. The wattage power for lights ranges from 150W to 1000W. The wattage power is directly proportional to the spread of light and heat.  

  • Single or Dual Bulbs 

The choice of bulb is very important. Single or dual arc bulbs are available. Dual arc bulbs are available as a combination of both MH and HPS lamps. Moreover, single and double-ended bulbs are available. Single-ended bulbs produce light in an arc. Double-ended bulbs produce light the way fluorescent tubes do. Double-ended grow bulbs are more efficient and thus cover a larger grow area.   

  • Choosing the Right Reflector 

These lights produce a huge amount of heat. Therefore, the choice of the right reflector to balance its effect is crucial. Air-cooled and water-cooled reflectors help in accommodating the heat and ventilation in the area.   

Where to Hang the HID Lights for Maximum Plant Growth?

The lamps get hotter, and if they are not hung at an optimal distance, they can damage the plants. Therefore, it is important to hang lights at an optimal distance. The best height for the lights depends on various factors, including the stage of the growing plant, the angle of the lamp, and the intensity of the light.

The earlier the plant’s growth phase and the lesser the intensity of light, the lower the height of lamps. The later the plant’s growth stage or the higher the intensity of light, the higher the lamps.

Advantages of Using HID Lights for Plants

HID lamps have several advantages:  

  • They are more reliable than other light technologies.
  • They are affordable and economical for the initial setup.
  • They provide smooth and consistent light without any distortion. 
  • They have high light penetration, even to the farther plants. 
  • Their light spectrum is very useful for flowering, fruiting, and vegetable growth. 
  • They help produce warmth for plants in cold weather conditions.  
  • They last for 10,000 to 20,000 hours.
  • They help in the growth of specific plants, e.g., cannabis plant growth.  
  • For small-scale growers, the HID light system is budget-friendly. 

Conclusion

As light is the major source of health in plants, the higher the light production, the better the plants’ health will be. So invest in a good lighting system for your indoor plants. HID lamps are available in different types and different brands on the market.

The important factor is to choose the right lamps depending on your cultivation area, the required intensity, and the plants you are growing. Keeping within the budget and long-term goal, you can select the type of HID light for your plants. Do not forget to time-test your mode of lighting before choosing the right product!

How to Water Your Super Soil? – Dos and Don’ts

Watering Your Super Soil

Not having to worry about the maintenance of your soil is an advantage while using super soil. However, watering it efficiently is crucial to keep it alive and in optimal conditions.

In search of the best one for your garden, did you forget to pay heed to the watering routine? We’ve got that sorted for you.

How to Water Super Soil?

It requires more than just water trickling down and making your soil wet. It requires consistency, a proper routine, the right kind of water selection, and mechanical tricks that do not disturb the soil.

Check our best Super Soil: AutoFlower Super Soil Concentrate

We’ve got a list of what you should do and what you shouldn’t!

What to do? 

1. Monitor Moisture Levels Regularly 

Stick your finger about 2 inches deep into the soil. If this top layer feels slightly dry, it is your sign to water it. Dehydration will cause the plant to dry out, whereas over-watering can cause fungal build-up. 

2. Use Good Quality, pH-balanced Water

Always use clean, chemical-free water. Make sure that it is neither too acidic nor too alkaline. Filtered water is favored more than tap water since tap water often contains harmful chemicals. 

3. Water the Soil Only

When you’re watering your plant, it is crucial to ensure that you are watering the soil only. It is necessary to keep the soil hydrated so the plant can carry out its essential processes. Avoid splashing water on the plant itself.

4. Use Dechlorinated Water

Dechlorinating your water is essential. You can do so by letting a bucket of water sit overnight. The chlorine will evaporate, and then you can use it to water your plants.

5. Water in the Morning

Watering your soil in the morning not only helps the excess moisture to evaporate but also prevents the progression of fungal diseases. 

Check our another amazing Product: Nutrient Growth Shot

6. Mulch Around

Mulching means adding a layer of organic matter into your soil to conserve moisture, regulate temperature, and suppress weed growth. Spread your mulch 2”-4” deep around the plant. Mulching needs to be done every year as it decomposes into the soil.

7. Water Deeply

Watering the soil deeply and thoroughly ensures a deep and strong root system. It distributes the nutrients evenly and minimizes runoff. 

8. Make Use of Drip Irrigation Systems

Drip irrigation systems help in targeting specific areas and root zones that require watering. They make sure your soil gets consistent moisture while also preventing water wastage. Another bonus is that they are effortless to install. 

9. Adjust According to Plant Needs

Different plants have different water requirements, so it is important to adjust watering according to their needs. Plant needs can change based on the type of plant, the stage of growth it’s in, and outdoor temperature. 

Super Soil Watering

What not to do? 

1. Don’t Water at Night Time

Watering at night does not allow the excess moisture to evaporate and, as a result, causes bacterial, fungal, and viral growth.

2. Avoid Using Cold Water

Using water colder than the room temperature can inflict physical damage to your plants. Cold water shocks the root and shoot system, which can be seen in the wilting, curling, and browning of leaves. 

3. Never Water Leaves Directly

When water sits on leaves for too long, it can promote the germination of fungal spores. It can also lead to diseases such as leaf spot and powdery mildew. Hence, it is advised not to water the foliage. 

4. Avoid Overwatering

Water only when you feel the soil is getting dry. Use your fingers to determine whether the soil is dry enough to be watered again. Overwatering causes stunted growth and can also lead to the death of the plant due to lack of oxygen. 

5. Don’t Follow Schedules

Each plant is unique with its specific needs, and following the same schedule for each type of plant can be counter-productive. 

Best Water for Super Soil 

Has the thought of watering your soil with distilled water crossed your mind? That’s least likely to disrupt soil pH and mineral concentrations right? Well, you’re not the only one in that boat. Unfortunately, that is not the best choice. The lack of minerals in distilled water makes it unsuitable for watering plants.

Now that distilled water is canceled out due to insufficient mineral content, let us also cancel out the usage of heavy metal-loaded hard water. This leaves us with the option of rainwater, and/or bottled water which has a neutral pH, the right amount of minerals for a regular boost to the soil, and no added chemicals.

Conclusion 

The only maintenance our super soil needs is timely and adequate watering with the right type of water. Making a routine and strictly adhering to it is crucial for the well-being of your soil, which eventually leads to the well-being of your plants.

Ensure you go through all the do’s and don’ts we’ve carefully researched and listed above for you!

Happy planting!

What is Organic Super Soil?

Organic Soil super

The terms “organic” and “super soil” may sound like something beneficial for your plants. Your intuition is right, though! 

There’s nothing that enriches soil better than organic amendments. When these organic amendments combine in appropriate proportions, all in one place, you can call it organic super soil. 

This is anything and everything you’ll need for the healthy growth of your super-demanding plants!

What is it Made of?

It is a blend of the most nutritious organic components there are. It is like a superpower potion for your soil that allows the ideal growth of high nutrient-demanding plants.

Here are all the ingredients it is made up of. Each of them is equally important; however, depending on the plant’s requirements, they may be halved, or eliminated to achieve a suitable blend.

Base Soil (1:1:1 Ratio of Peat, Compost, and Aeration)

Organic material! Isn’t that what our first guess is going to be? However, to incorporate all the organic material, we need a medium, which we often call the base. The base can be any soil, perhaps the cheap stuff bought from the market. This will enable us to have a platform to add the various nutrients, natural amendments, and any specific fertilizer required to grow the plant of your interest.

Check our best Super Soil: AutoFlower Super Soil Concentrate

Worm Casting

It is a special type of organic fertilizer produced by special red worms. Worm castings are rich in nitrogen and microorganisms that enhance soil structure. 

Blood Meal

A blood meal is a slow-release nitrogen amendment that promotes the vegetative growth of plants. It not only acts as a fertilizer but is also useful in keeping animals away due to its smell.

Regular Bone Meal

Regular bone meal takes longer to decompose and is thus a slow-release amendment. Bone meal is rich in phosphorus and calcium that are beneficial for the plant in its fruiting and flowering stages. It also helps in the development of a healthy root system. 

Fish Bone Meal

Didn’t know there was another kind of bone feed made exclusively from fish bones? It’s called the fishbone meal. As the name suggests, it is made up of dehydrated fish bones and scales. Its richness in minerals like phosphorus, nitrogen, and various amino acids contributes to the budding, flowering, and fruiting of plants and is absorbed in a relatively short amount. 

Super Soil Organic

Oyster Shells

Oyster shells are composed of calcium carbonate, another excellent source of calcium for plants. They improve nitrogen uptake and can also help balance the pH level of the soil if it gets too acidic. 

Kelp Meal

It is an ideal organic fertilizer that can be used for all types of vegetative and non-vegetative plants. Kelp meals provide nutrients like iron and manganese, directly aiding in the growth of plants. In addition to that, it also enhances disease resistance.   

Check our another amazing Product: Nutrient Growth Shot

Feather Meal

Feather meal, as the name suggests, is derived from avian species. Due to its high phosphate content, Their feathers are a great source of amino acids for the plant. It also acts as an organic food for the soil microbes.

Azomite

Azomite contains various trace minerals, including magnesium, zinc, copper, iron, etc. Using azomite in the soil has shown rapid growth and improved yields. 

Epsom Salt

Epsom salts are added to the soil as they contain high amounts of magnesium and sulfur. Using the right dosage can help your plants grow bushier and increase their chlorophyll production.  

Mycorrhizae 

These are fungi that live and grow in damp soil. They benefit the nutrient and water uptake system of the roots, specifically for young plantlets with primary roots. They may naturally be present in the soil, but this is one live organic component that we cannot miss out on, and thus, it is added to make this soil superior quality.

Bat Guano

Bat Guano contains a high nitrogen, potassium, and phosphorus content. It provides a boost of nutrients that can feed your plant through all the stages of its growth. 

Benefits of Using Organic Super Soil

  • Eliminates labor as you do not have to add any amendments or fertilizers manually
  • Improves soil quality and promotes plant health
  • Likely to speed up the growth of your plants
  • Free from chemicals and toxins, so you know the plants grown are purely organic 
  • Keeps a steady nutrient supply, neither less nor more than what is required

The best organic super soil is the one that gives returns for several years.

Conclusion

No doubt, slightly expensive on the pocket, this type of soil is one of the best treats for your plants. If you’re considering growing cannabis, you need to get your hands on this fancy soil ASAP.

Its perfectly balanced composition rules out all possibilities of nutrient burn, as well as leaves no chances of deficiencies, featuring the most effective organic amendments. The best part is its slow-release mechanism that allows you to use this soil for a longer period.

What are the Benefits of Super Soil?

Benefits of Super Soil

Gone are the days when we could just sow seeds and the plants would emerge out of them. They were healthy plants, but as humans continued to use the same soil for all types of plant growth, the nutrients in the soil were depleted. Now, our soil lacks the nutrients essential for plant growth. This means it is difficult to get healthier plants if we solely rely on natural soil. 

On the contrary, we cannot choose chemically made soils because they are harmful to human health. They may boost plant growth, but the fruit is not healthy for consumption. Such fruits will lack nutrients and hence give no benefits. Considering this situation, we have come up with an organic super soil to meet all your requirements.

Check our best Super Soil: AutoFlower Super Soil Concentrate

What is Super Soil?

The use of California super soil development shot is rising with every passing day in the cannabis industry. If you don’t know what the soil is, let us look into it. This is a mixture of soil that contains the essential amount of nutrients required for plants to grow properly.

At first, the nutritional needs of a plant are determined by using various advanced methods and these needs are considered while formulating the soil. It includes both the macro and the micronutrients to make it self-sufficient.

Benefits

Are you wondering why there is a hype of super soil in the industry, and why everyone keeps talking about it? Well, that’s because this soil is no less than a hero. People have used the soil and given positive reviews. Studies have proven the benefits they can bring to your plants. Here is a compilation of the benefits.Super Soil Benefits

Stress-Free

Using California soil growth shot for plants will keep you away from stress. Once you have made it and added it to the plants, there’s no need to worry about the presence or absence of any nutrients. The risk of nutrient deficiency is very rare. Our soil is 800% denser than the traditional soils.

Check our another amazing Product: Nutrient Growth Shot

Organic Nature

The best advantage is that our California soil growth shot is formulated with organic matter to keep your plants healthy. It contains all the nutrients in their raw or organic form. This will provide better quality fruits and flowers that have a better aroma and flavor. The fruits would also be more nutritious compared to fruits grown in chemical soils.

Full Support

Unlike the traditional soils, where plants get a lot of nutrients at first but are left without nutrients in their later stages, we have made a soil that would fulfill the requirements of the plants until their life. Your plants will stay healthy from the initial days to the last days.

Diverse Use

You can use the soil no matter where your plants are! If you have indoor plants or outdoor plants, this soil is the best choice for you. The soil will protect your plants from foreign pathogenic microbes such as fungi or bacteria. It contains beneficial microbes to keep away the harmful microbes.

Roots Flushing

One huge responsibility that we take from your shoulders is the need to flush roots all the time. Since California soil growth shot is free of chemically added products, you are free from the tension of flushing roots all day.

We have got a look into the benefits, but it is important to know that soil cannot be used in all types of crops. This process also requires immense planning, as soil mixtures require to be made 30-60 days in advance. Yet, if you prefer to purchase the soil you can enjoy the benefits without this procedure.

If you want to look deeper into what nutrients are present in our soil, you can continue further. 

  • The primary ingredient is nitrogen, as it is the major ingredient required for plant growth. Nitrogen helps to maintain the color of the leaves and the fruit.
  • Phosphorus is vital for maintaining the healthy roots of the plants. This micronutrient is involved in energy transfer throughout the plant.
  • Potassium, the third major ingredient, is present in these soils to regulate respiration, and photosynthesis and maintain the turbidity of cells. This can also help the plant to combat harsh environmental conditions.
  • Calcium has been included because it is vital for the development of roots and leaves. It is linked with the absorption of other major nutrients and aids in molybdenum mobility.
  • Magenium is a constituent of chlorophyll. Hence, the plant needs to grow and prepare food for its survival. This is a cofactor for many enzymatic reactions.
  • Sulfur plays its role in the formation of plant proteins along with the nitrogen. It is a major component of the three essential amino acids that are methionine, cysteine, and cystine. 

Along with these nutrients, some trace elements have been included in the soil for sale to make the plant healthier. These nutrients include boron, copper, iron, manganese, and zinc. All of these nutrients play their part in making the plant healthy.

How to Use?

If you have already decided to buy a pack of California soil growth shots, you should first be aware of how to use this soil properly to prevent any unfortunate events from occurring later on. Follow these simple steps to use our pack of soils effectively for your plants.

  • Take 3, or 2 ounces of soil in a container of one-gallon size. 
  • Add the soil to the container and mix it with the potting soil.
  • Fill the container by adding potting soil.
  • Keep watering the plants till harvesting.

How Much Super Soil Should You Use?

Use Super Soil

Super soil has all the nutrients your special plants need. However, just using it doesn’t suffice. Using it in the correct quantity is crucial to shape the overall health, progress, productivity of plants, and effectivity of the soil. 

Let’s dive into everything you need to know about how much quantity of this superior quality soil you’d require for desirable plant growth.

Check our best Super Soil: AutoFlower Super Soil Concentrate

Factors Determining the Quantity of Super Soil 

There’s no one-size-fits-all approach for this soil. Even though the suggested usage rate of this magical product is 1 kg per hectare, applying it at a slightly higher rate causes no harm.

It increases land productivity and enhances the production quality of crops. And since this type of soil is purely organic, you don’t even need to worry about long hours of waiting before using the land.

Listed below are a couple of factors that you need to be mindful of to use the right amount:

Size of Gardening Area

The amount of soil to be used is directly proportional to the size of your pot and the gardening area available. Avoid filling it to the brim to leave sufficient space for watering. After all, who wants to make a mess around pots and ruin gardening aesthetics? 

Check out our amazing product: Nutrient Growth Shot

Plant Type

The type of plant you’re growing is the most significant factor that decides the dosage of soil. While some plants may require a hefty amount to survive in the nutrient-rich environment, others suffice with only a little mix.

Weather Fluctuations

On certain days, it may rain, and on some days, the sun might be too hard on your little plants. Hence, different days call for different adjustments. You’ll need to keep a weather check to avoid wasting your hard-earned money. 

Super Soil uses

Significance of Using the Correct Amount

Determining the correct quantity to use in farming and gardening has high-yield significance in the industry. This amount takes care of the overall development, growth, and productivity of the crops. 

Nutrient Balance

Just like an adequate amount of nutrients is required to fulfill our needs, the same is the relation between soil quantity and the nutrition it provides to the plant. Overuse or insufficient soil can adversely affect your production. 

Soil Structure 

The accurate amount used greatly influences the framework of soil, its aeration, and drainage. Suppose you don’t take this into strict account. In that case, it will lead to overstuffing of soil, unnecessary wastage, and an unhealthy environment for microorganisms to perform function.

Overuse Impact

Now, it’s only natural for you to believe that such a beneficial product would cause no harm. However, that’s not the case. Just like every other substance, an excess amount of this gem of a product could also result in drastic adverse effects. When used in excess or super concentrated forms, this might even burn your plants. 

To prevent soil stuffing and leaving your plants to burn, it’s best to use 1 part of super soil with 3 normal average organic soils, similar to the one you used in making this.

This helps maintain a normal balance of soil. Otherwise, if roots burn, they cut down on the nutrition of the whole plant and lead to its death. However, unintentional overfertilization is common, so be super conscious about the amount you are using, or you may suffer drastic outcomes later.

What Happens if You Use Less Than the Required Amount?

You lose the energy to function if you’re not nourished well, right? The same happens if you don’t nourish your plants well. If you’re not using the appropriate amount, you’re not fulfilling the purpose of using this magic soil. Eventually, you won’t get the desired quality product. If you let that money flow and use an adequate amount, you can get a high-yield crop, making you lots of bucks!

Final Words

In this socioeconomic world condition, who doesn’t want to make the most out of their work and investment? Ready to use this soil is a magic potion; only the usage of the right amount will serve your purpose. This article serves as a guide and prepares you to use it the right way and enjoy its crop product if you do it right! 

Got specific questions? Write to us, and we’ll gladly answer you.

What is the Soil Amendment?

Soil Amendment

It’s highly unlikely that all gardeners are lucky enough to have naturally balanced soil. This calls for man-made agents to balance conditions. We call them amendments. 

Substances, or agents, added to soil to improve its overall quality are called soil amendments. They may come from natural sources or be synthesized artificially. They compensate for nutrient deficiencies and enhance features such as aeration, water retention, drainage, structure, and permeability. It is a general term that is used for a bunch of commercially available products for your soil.

Since each soil has a different composition, the amendments for each soil vary.

Here’s a comprehensive guide we’ve worked on with years of gardening experience and immense research to help you choose the best amendment for your garden.

How to Amend Soil?

To amend soil;

Step 1: Conduct a soil test to analyze its chemical composition and physical properties

Step 2: Garden soils are generally sandy, loamy, or clayey. Based on the type of soil in your garden, choose a compatible amendment.

Step 3: Some commonly used amendments are manure, compost, peat moss, bone meal, and minerals such as sulfur and lime.

Step 4: Next, you need to calculate the amount of amendment needed.

Step 5: Using the optimal method for the chosen amendment, add it to the soil.

Step 6: Thoroughly water the soil and monitor soil and plant health.

Keep crops in rotation for healthier soil and better yields.

the Soil Amendment

 Soil Amendments Vs. Fertilizer 

Soil Amendment Fertilizer
Designed to improve the physical properties of soil. They may or may not provide nutrients directly to the plant Designed specifically to provide a particular set of nutrients that plants can uptake.
Made up of organic materials and naturally found minerals Can be organic or synthesized both
Usually used for long-term, gradual improvement of the soil Used for short-term, quick impacts on plant growth
They can be used by mixing in with the soil or as a top dressing Fertilizers are directly applied to the soil

How do you Choose the Right Soil Amendment?

Before you begin amending the soil for your garden, there are a couple of factors that you must consider:

1. Soil Type and Texture

Sandy soils require amendments that allow them to enhance their water retention abilities. Clayey soils require a boost in their aeration, porosity, and permeability.

The techniques and materials to amend them will also differ when the requirements are different. These requirements specific to the type and texture of soil must be considered while choosing the amendment.

2. Nutrient Content: pH and Total Dissolved Salts

Soil naturally contains nutrients such as phosphorus, zinc, calcium, and sulfur, which are required for plant growth. They contribute to the soil’s overall pH.

Before you amend the soil, thoroughly study the composition of what you’re adding. You don’t want to miss out on nutrients and salts that the soil requires. Similarly, you don’t want to double the amount of certain substances that are already present in the soil.

This will delay plant growth and make conditions worse.

3. Longevity of the Amendments

If you’d like immediate improvements that last short term, you can go for amendments that decompose faster. In the case of soil amendments, the slower, the better. If you’ve got the time and practice patience, slow-release amendments such as bone meal are a great choice for long-term soil improvement.

4. Cost and Availability 

If you think adding an amendment to your soil will allow you to sit back and relax for the rest of your life, you have a second thought coming your way. They, too, need maintenance.

Consider them as booster shots for your soil.

The need to repeatedly add amendments with time and as required is why you should also consider their cost and availability. They have to be available so you can buy them. To buy them, you have to be able to afford them!

5. Application Method

Does the soil need to be prepared? Or plants that need to be topped.

All amendments may not be suitable for application at all growth stages, so you must keep an eye on and research well before finalizing one.

6. Compatibility with Crops

Do all amendments work for all plants? Certainly not! Ensure your chosen amendment encourages growth rather than adversely affecting your plants’ health and yield.

If you’ve got multiple kinds of crops, you might want to consider using different amendments.

7. Regulatory Conditions 

Finally, don’t forget to check the state laws for the amendment you’re using. After all, precaution is better than cure.

Conclusion

Choosing the right soil amendment can put a full stop to numerous plant issues. Of course, you want to provide the healthiest environment for your plants. This makes it important to be conscious about the type of amendment you choose for your soil.

Consider cost, availability, longevity, and composition, and compare it with your soil type and texture. Don’t forget to check the regulatory compliance for your chosen soil aid.

How to Mix Super Soil?

Mix Super Soil

Organic cultivation indoors is incomplete without the usage of super soil. We’re sure you’ve heard this name multiple times and are now intrigued to try it out yourself. But what is it? Where do you get it? How to use it? Is it really important?

Find all the answers and the most reliable recipe you can find on the internet here!

As the name suggests, it is a superior quality of soil that contains all organic components in balanced ratios that support the growth of demanding plants such as pots. It replicates the healthiest soil found on the most fertile lands.

This ready-to-use soil has the ideal balance of all nutrients that a plant may ever need. Blood meal, bone meal, worm castings, and many other amendments are pre-amended, requiring absolutely no work. This eliminates the need for labor and extensive fertilizer usage. 

Check our best Super Soil: AutoFlower Super Soil Concentrate

It’s a jackpot for indoor cultivars with an ideal soil structure, perfectly balanced pH, a strictly organic approach, and simple and easy usage.

Recipe Breakdown

Let’s have a look at the secret ingredients of this soil recipe:

For 50 Gallons For 100 Gallons
Base Soil (1:1:1 ratio of peat, compost, and aeration 7 cubic ft 14 cubic ft
Worm Casting 1.25 lbs 2.5 lbs
Blood Meal 2.5 lbs 5 lbs
Fish Bone Meal 1.25 lbs 2.5 lbs
Regular Bone Meal 1.25 lbs 2.5 lbs
Oyster Shells 1.5 cups 3 cups
Kelp Meal 1.5 cups 3 cups
Feather Meal 2.5  lbs 5 lbs
Azomite 1 cup 2 cups
Epsom Salt ⅜  cup ¾ cup
Mycorrhizae  1 tbsp 2 tbsp
Bat Guano 2.5 lbs 5 lbs


Mix Super SoilsMixing it – Step-by-Step Instructions

Step 1: Prepare the Base

Choose a container large enough to fit in all the soil and amendments yet allow room for thorough mixing. Start by preparing the base soil, taking peat, compost, and aeration in a ratio of 1:1:1.

Step 2: Add the Amendments

Next, measure the quantities for amendments depending on how much soil you want to make. The table above provides a recipe for 50 and 100 gallons of soil. You can alter the quantities depending on how much soil you want to make. These ratios are ideal for growing pots indoors. Feel free to tweak the ratios according to your plant’s requirements or the type of base soil you use.

Check our another amazing Product: Nutrient Growth Shot

Step 3: Give it a Good Mix

Use your hands to mix the soil. This will help you to distribute all amendments uniformly. Break even if you find any clumps. You know it’s done when you can’t differentiate any amendment. Using a shovel or rake wouldn’t give the best results; thus, we recommend using hands only.

Step 4: Time to Water

It is now time to activate the soil. It would be best to get the soil damp enough to activate its microbes. Make sure you do not overdo it. 

Step 5: Let it Age

Store this damp soil in buckets, preferably covered with a lid. This is called the aging of the soil. You are giving it enough time to break down the amendments to start the release of nutrients. 2 months should be a good time to return to your soil.

Step 6: Prepare for Planting

Before you start putting it, please give it a good mix. Scoop some to your pots, and sow your plantlets. You might want to add a seed starter mix if you plan on sowing seeds.

Super Soil Vs. Regular Soil

Super Soil Regular Soil
Demanding plants such as cannabis use this type of soil, as they cannot grow under general conditions and basic nutrients This type of soil is used for general purposes. If you want to grow plants or some tomatoes in your pots, regular soil will help
Uniform and identical structure  Varies depending on the location, can be sandy, clayey, or loamy
Balanced nutrients and optimal pH for growth Nutrient composition and pH vary greatly and need to be adjusted
Super easy to use, with no need for additional fertilizers or amendments Requires the addition of fertilizers and amendments
Available selectively, or you have to make the soil mix yourself Easily available
Expensive Cheap and affordable

Conclusion

All in all, superior soil is everything you need for organic cultivation. The recipe came out specifically after the laws allowing citizens to grow pot at home. Turns out, you can grow almost anything and everything in this mixture.

Make it yourself for an experience and see the wonders it can do. It is available commercially, in stores, and online, too.

Let us know about your experience making it from scratch. 

Happy Composting!

How to Clean Oyster Shells like a Pro?

Clean Oyster Shells

When cooking, baking, or crafting, oyster shells can come in handy to provoke your creative side. But before you bring them into use, take a look. EEEH! Not something you’d eat in, right? 

More than running them underwater is required. They need to be sanitized, soaked, scrubbed, bleached and rinsed. Sometimes, the process must be repeated twice to eliminate all the dirt on the exterior and smell on the interior. Let’s get started!

Step 1: Empty the Oysters

It’s likely that the shells you have contain tiny bits of raw meat stuck on the inner walls. Before you begin the cleaning process, thoroughly sift through each one.

In case of a closed shell, use an oyster knife to break it open and empty all components before you begin cleaning. 

Step 2: Rinse them

Hold them under running water, preferably on the sink, to remove all surface mud, loosely attached to the shell. If you’re concerned about the smell spreading around the kitchen, use a hose and clean them outdoors.

Step 3: Bleach them

The next step is to bleach them. For that, you need an empty bucket. Fill it up with equal ratios of bleach and water. This will dilute the bleach, and the strength of the shells will not be altered.

White vinegar can be used as an alternative to bleach if your skin reacts against bleach.

Soak all the shells in the bleach and water solution for about an hour. This will allow the bleach to sanitize the shells effectively. Moreover, it will also loosen the particles stuck between the textured areas of the shell. Drain out the liquid once you’re ready to begin scrubbing.

Step 4: Scrub

Use a mild solution of dish soap and water. It’s time to soak the shells in it again. Pick each shell, one at a time, and use a hard-bristled nylon toothbrush. Scrub in and out, over and under, to get all the dirt off them. Repeat this process for all shells in the bucket.

Step 5: Rinse again 

Rinse them with clean water to get the soap all off from them.

Oyster Shells

Step 6: Towel Dry

Use a towel to pat the shells. You want to make sure they’re nice, clean, and dry. Put them under the sun. 

Step 7: Time to add some Shine

Even though you can stop at step number 6, here’s a tip to make your shells regain their lost gloss and shine. Use a couple of drops of baby oil on a thin towel sheet. Use it to rub over them and see the magic with your eyes.

Give yourself a pat on the back once you’re done cleaning! You deserve it!

Oyster Shells for Gardening

Once you’ve cleaned them thoroughly, you can use them for anything. Most people decoupage them and bring out their crafty side. In comparison, some reuse them to bake oysters and enjoy a fancy dinner at home.

We like to boil them, dry them, and crush them to approximately gravel size to use on plants. 

Is this something you’re hearing for the first time? But wait till you find out how beneficial an oyster shell amendment is for your plants.

  1. Calcium present in these shells helps neutralize the acidic pH of the soil. Calcium is an essential mineral for cell wall strength, providing the plant structure.
  2. Elements such as magnesium may not be found in soil naturally. They are a great magnesium source that helps uptake soil minerals. Magnesium also helps in the formation of the photosynthetic pigment chlorophyll.
  3. Crushed shells improve aeration in the soil by directly enhancing soil structure.
  4. Since it is a slow-release amendment, it is capable of providing long-term benefits to the soil.
  5. These shells also repel insects, safeguarding your plant.

Conclusion

Smart work is usually better than hard work, but there are no shortcuts to cleaning oyster shells: one or a hundred. To achieve the best results, you must carefully follow all the instructions without missing any steps. Remember, no cheating!!

The best way to clean them is by giving them enough time and individual attention and using a mild concentration of detergents, bleach, soaps, and oil. Prevent them from damage by overdoing any step.

Break and crush them as a soil amendment, and watch your soil get a second life.

Have more questions? Feel free to write to us anytime!

What is Worm Casting? And How to Use it

Worm Casting

Worm castings have dramatically increased sales, especially after trends inclined towards organic farming and foods. But what is this hot ingredient that has become the talk of the town?

Worm casting, also known as vermicompost and worm humus, is a natural, purely organic fertilizer used on all sorts of plants. These tiny black balls, often called black gold, are the waste excreted by earthworms living in the soil. It contains all essential nutrients required by the plant to grow.

If you’ve been suggested to use it for your little plants, this is your sign to get one immediately!

Where Do They Come From?

The answer’s pretty simple. The earthworms feed on the organic materials present in the soil. On harvest farms, they feed on the organic material provided to them. This could be anything from kitchen waste to rotten fruits, live and dead plants, animals, insects, and animal poop. 

Now, as a natural process, they excrete what their body doesn’t need. That’s it, your most valuable, nutrient-rich fertilizer.

What do they Look Like?

At a distance, your naked eye cannot differentiate them from the soil. Often black and sometimes dark brown, they look quite like the soil. When you look closely, you’ll see tiny dots-like structures that can easily clump together and crumble apart.

Not too dry and not too soggy, but the best quality worm castings have a little sheen, reflecting the moisture and an appearance like a worn-out sponge.

Sometimes, they have leftover organic material, such as food bits, leaves, or maybe shredded newspaper, too, but before they are packed and commercialized, vermicompost is sieved out and leaves the extras behind. 

Worm Cast

Benefits of Using Worm Casting

This section will amaze you!

  1. They contain all vital nutrients for optimal plant growth.
  2. While chemical fertilizers can be specific to certain types of plants, the organic vermicompost is beneficial for all kinds of plants.
  3. It doesn’t burn your plants, so you can also sprinkle it directly over the plantlets.
  4. You simultaneously reduce the waste your garden produces – the worms eat it all!
  5. Perfectly balanced pH naturally, so it doesn’t alter any soil conditions.
  6. The best part is they do not smell. It might be difficult to believe initially, but worm casting smells like forest soil.
  7. Your soil becomes more absorbent with the use of this fertilizer, and thus moisture content is evenly spread out and available at all times.
  8. It can also remove wavy metals and toxic compounds from the soil, allowing your plants to flourish in a much healthier environment.
  9. Say goodbye to the hassle of keeping pests away, as this black gold is a natural pest repellent.
  10. It also helps curing and preventing diseases like crown rotting and wilting.
  11.  Drought heat and dress resistance are features that you’ll observe in plants treated with vermicompost.
  12. The soil structure is greatly improved with the addition of worm castings, which increases aeration and enhances drainage capacities.

How To Use Worm Casting In Potted Plants?

Are you tempted to use these castings for your pots? Whether you’re growing flowers for some aesthetics on your front porch or vegetables to consume in the freshest form possible, it’s suitable for all types of plants.

People most commonly use the following four methods to use vermicompost in potted plants:

1. Mixing with the soil

In a ratio of 1:5, mix the compost with the soil. You can do it inside the pot or mix it outside and then transfer it into the pot. It will allow the fertilizer to mix evenly with the soil without the risk of over-fertilizing.

This must be done before sowing the seeds or planting the plantlets.

2. Top Dressing

Sprinkle about a tablespoon of this black gold onto the soil surface. It’ll rest there, and slowly, the nutrients will steep into the soil as it gently breaks down.

This method works for fresh pots and the ones already with plants.

3. Side Dressing

This method involves making a trench around the pot. In that trench, add your castings and water the area generously. This way, the nutrients will seep into the soil through the sides; thus, this method is called the side dressing method.

Ensure that you are using this method only for well-established plants.

4. Casting Tea

This one is the audience’s favorite. All you gotta do is steep a small amount of vermicompost in water and use that to water your potted plants. 

Be mindful of the dilutions to avoid over-fertilizing your plants.

These castings can be used twice as often as chemical fertilizers without damaging plants or soil. You change the frequency by observing how your plants react to it. Remember to always store these in a cool and dry place and avoid exposure to direct sunlight!

Conclusion

The next time you hear the word warm casting, you’ll know exactly what it means, where it comes from, how it is used, where it is used, and how beneficial it is for the plants and soil.

Call it the MVP of your gardening essentials or a high-end conditioner for the soil; you know it can be a game changer.

Happy Planting!

Confused about where to buy your organic castings from? Don’t worry! We’ve got you covered with that, too!